Selling Eduflow courses with Checkout Page
Learn how to add (recurring) payments to your Eduflow courses.
Eduflow is a teaching platform for creating and teaching university courses, online courses, employee onboarding and sales training.
This payment integration lets you add (recurring) payments to your Eduflow courses.
We'll create a one page checkout for your course and set up an automation that invites students to the course once they pay.
If you're new to Eduflow, have a look at the Getting started with Eduflow to learn how to set up your first course. It serves well as a demo of what a course on Eduflow looks like.
If you're new to Checkout Page, Checkout Page is a one page checkout and payment software. We help businesses accept payment online to sell pretty much anything, from software to cheese.
We use Stripe to securely process payments. You'll use your own existing Stripe account, or create a Stripe account while setting up Checkout Page.
Learn how to connect with Stripe here
In this integration, we'll use Zapier to automate the invite process when a student pays on Checkout Page. You'll use your own Zapier account as well. If you're new to Zapier, you can sign up here.
Please note: To integrate with Zapier, your Checkout Page account needs to be on the Scale or Grow plan.
Create a checkout for your course

To charge for access to your course, we'll create a checkout on Checkout Page. This can be a one-time payment or a recurring payment (subscription).
- Log in to your Checkout Page account. If you don't have an account yet, sign up here and complete the signup process.
- Go to your dashboard and click Create checkout
- Fill in the details and click Create checkout
- If you're selling a subscription, select one of your Stripe subscriptions. If you don't have a Stripe subscription for your course yet, create one.
- If you sell at multiple price points, either create a checkout for each price point, or use Variants to let your customer select a price option on the checkout.
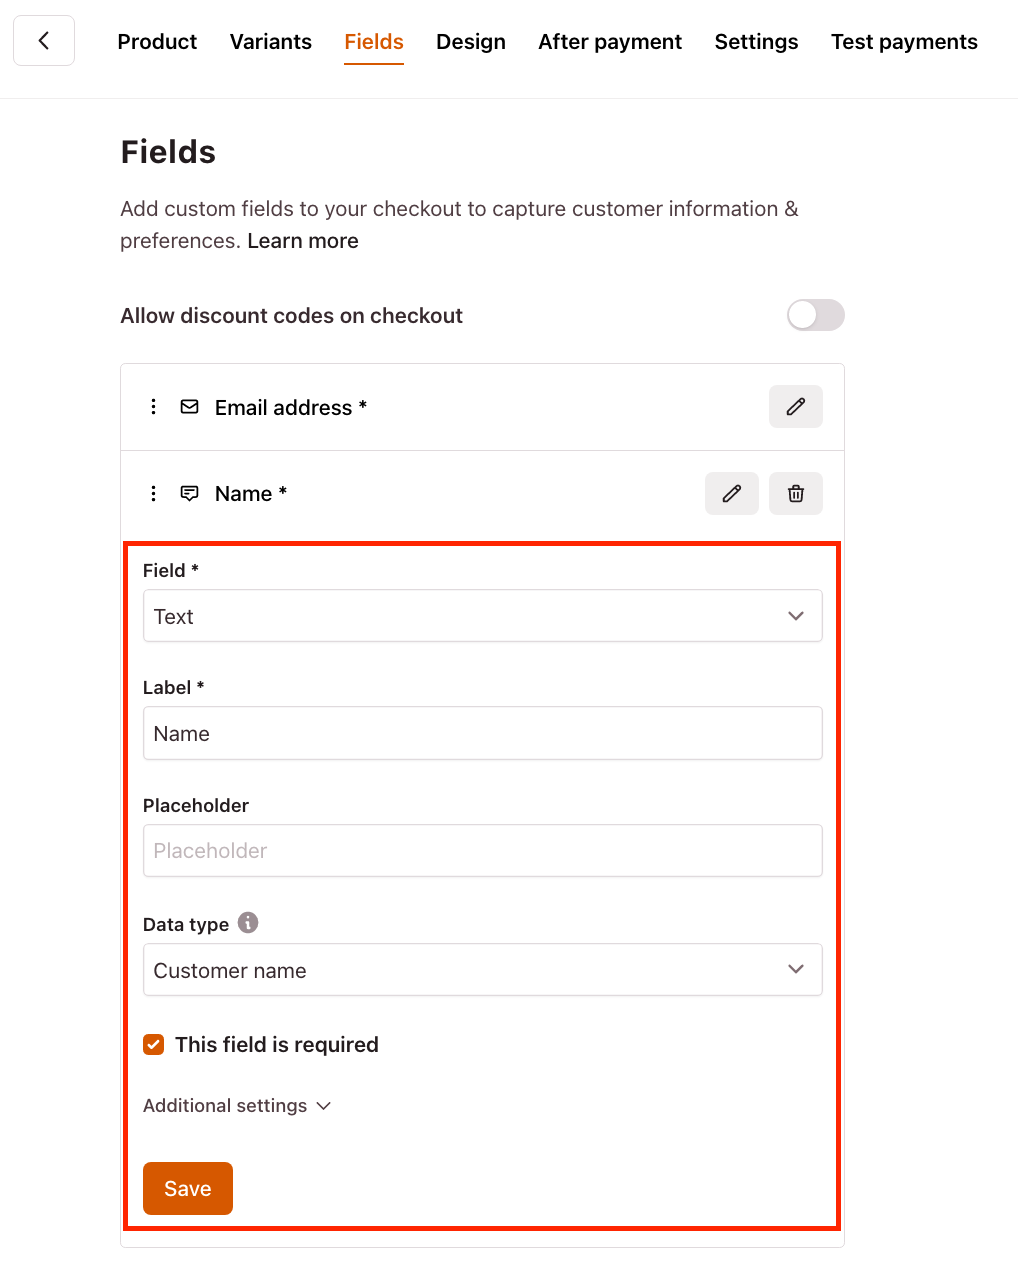
- In the Fields tab, add a custom field with these settings:
- Field type: Text
- Label: Name
- Data type: Customer name
- Tick This field is required and Save

Connect Checkout Page to Eduflow with Zapier
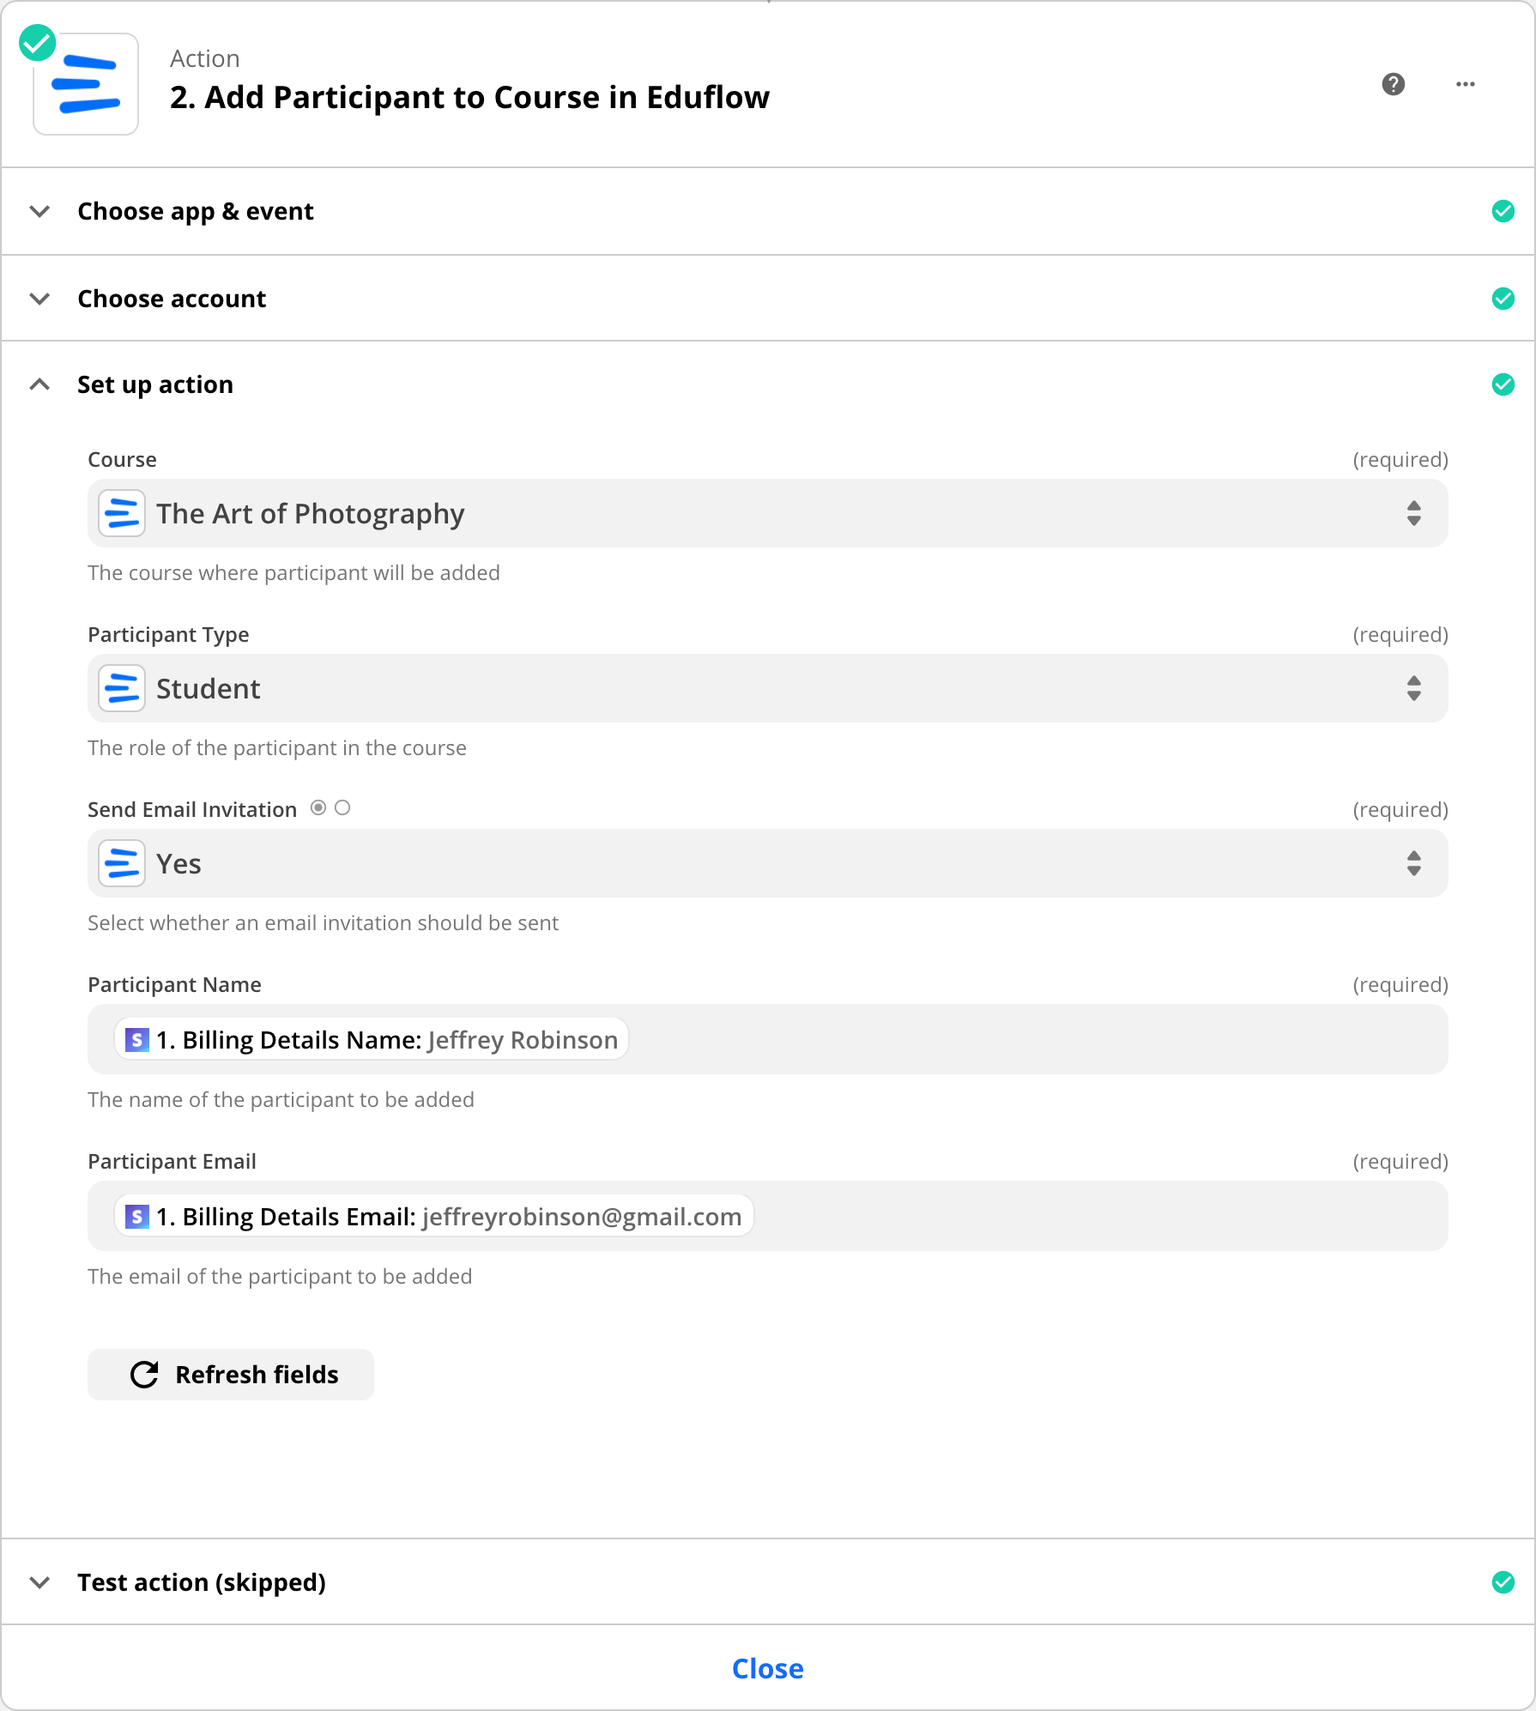
Once someone pays via the checkout we created in Step 1, we want to automatically invite them to our course. To do so, we'll make a Zap in Zapier. We'll make Zapier listen to the New charge event from Stripe, and trigger the Add Participant to Course in Eduflow action in Eduflow.
This template contains most settings to set up the Zap. You'll connect your Stripe account, connect your Eduflow account and choose the course you want to add students to.
- Log in to your Zapier account, or sign up for Zapier.
- Open this template zap and follow the steps.
- If you're prompted for your Eduflow API key, do the following:
- Open Eduflow
- Go to your Institution dashboard, select Settings in the sidebar and select Zapier & API in the menu
- Generate a new API key and click on Copy to clipboard
- Go back to the API key prompt and paste in the API key
- In the Action, select the course you want to add students to
- Keep Send Email Invitation to Yes to ensure students will receive an invite email once they pay

- If you want to test the integration without being charged, use a Stripe test key to trigger Zapier on test payments.
That's it! You're now able to charge students for access to your course and automatically invite them when they pay. You can add your checkout to your website and social media, or simply send the link to a one page checkout to your students.