Add Google Tag Manager to Checkout Page
In this help article, you will learn how to add Google Tag Manager to your checkouts on Checkout Page.
We only recommend using Google Tag Manager if you need fine-grained control over your tracking. For standard setups, we recommend using Google Analytics.
Once set up, Checkout Page will send two custom events to your tag:
checkoutpage-enter: whenever someone enters your checkoutcheckoutpage-checkout: whenever someone completes your checkout
The checkout event will also contain:
value- one time payments: total amount paid, including setup fee, variants and discounts
- subscriptions: product price, excluding setup fee, variants, discounts
checkout: the ID of your checkoutcurrency: the currency of your checkoutorderId: the ID of your customer’s order
To capture these events in Google Analytics and/or Google Ads, you also need to set up triggers and tags.
Instructions to add Google Tag Manager to Checkout Page
Follow these steps to add Google Tag Manager to your Checkout Page:
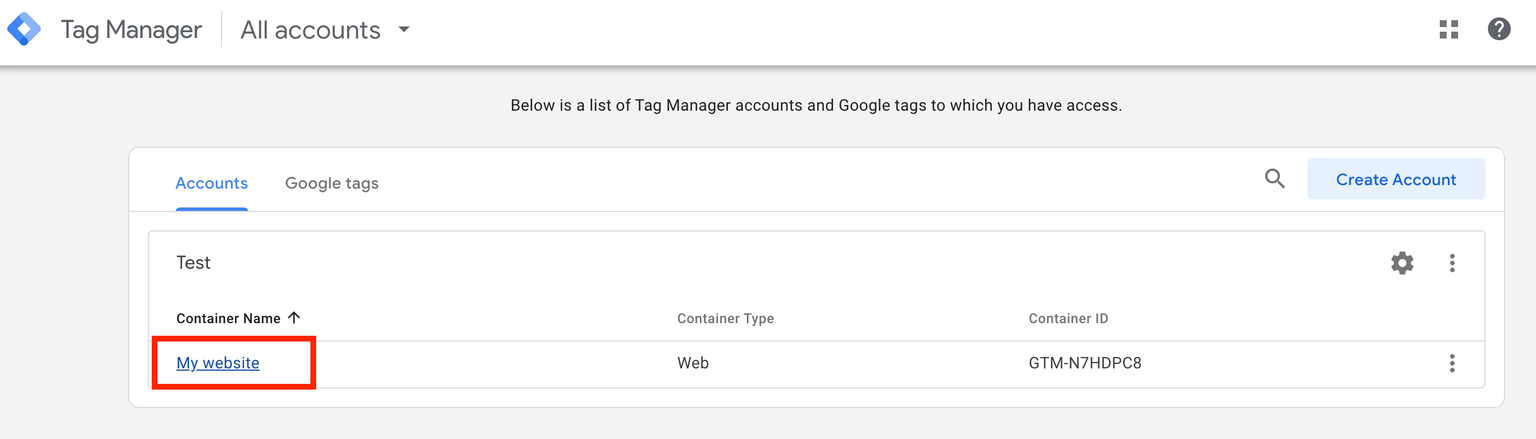
- Open your Google Tag Manager dashboard and click on your container under Accounts
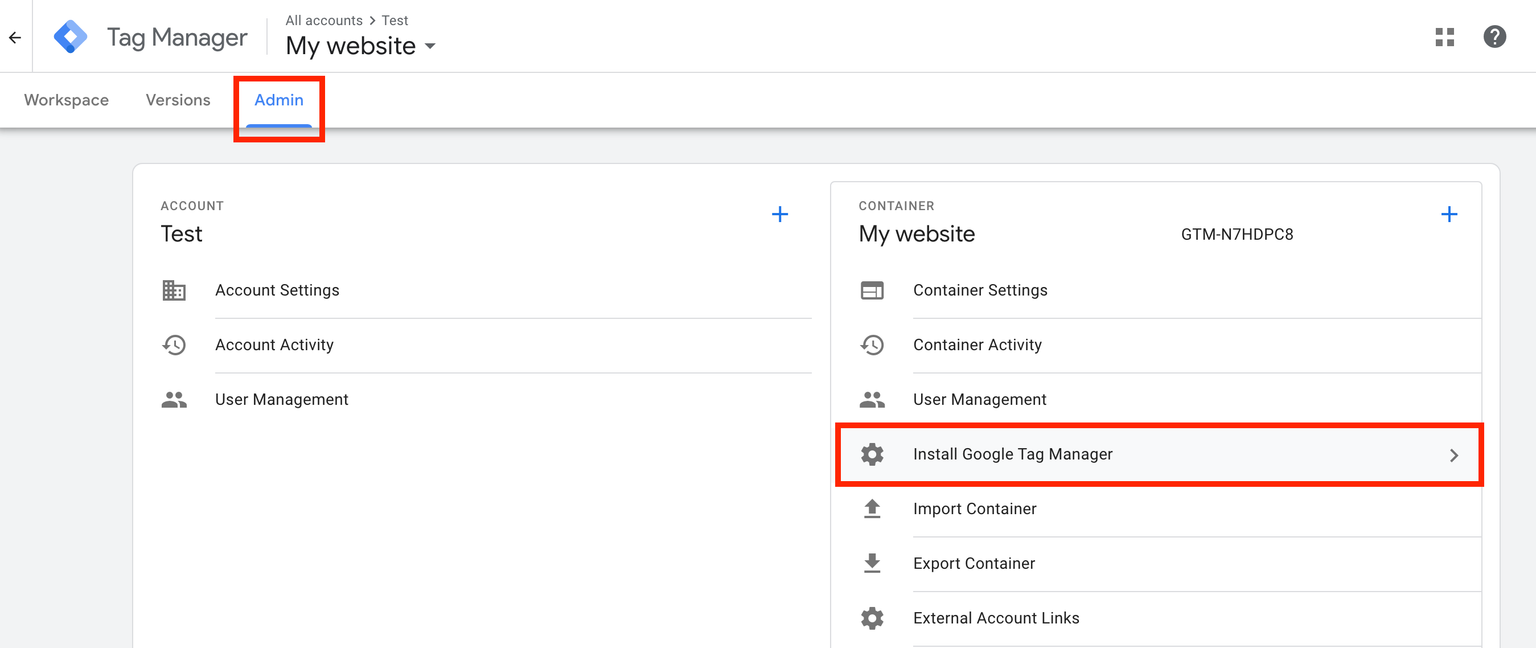
2. Navigate to the Admin tab and click to Install Google Tag Manager
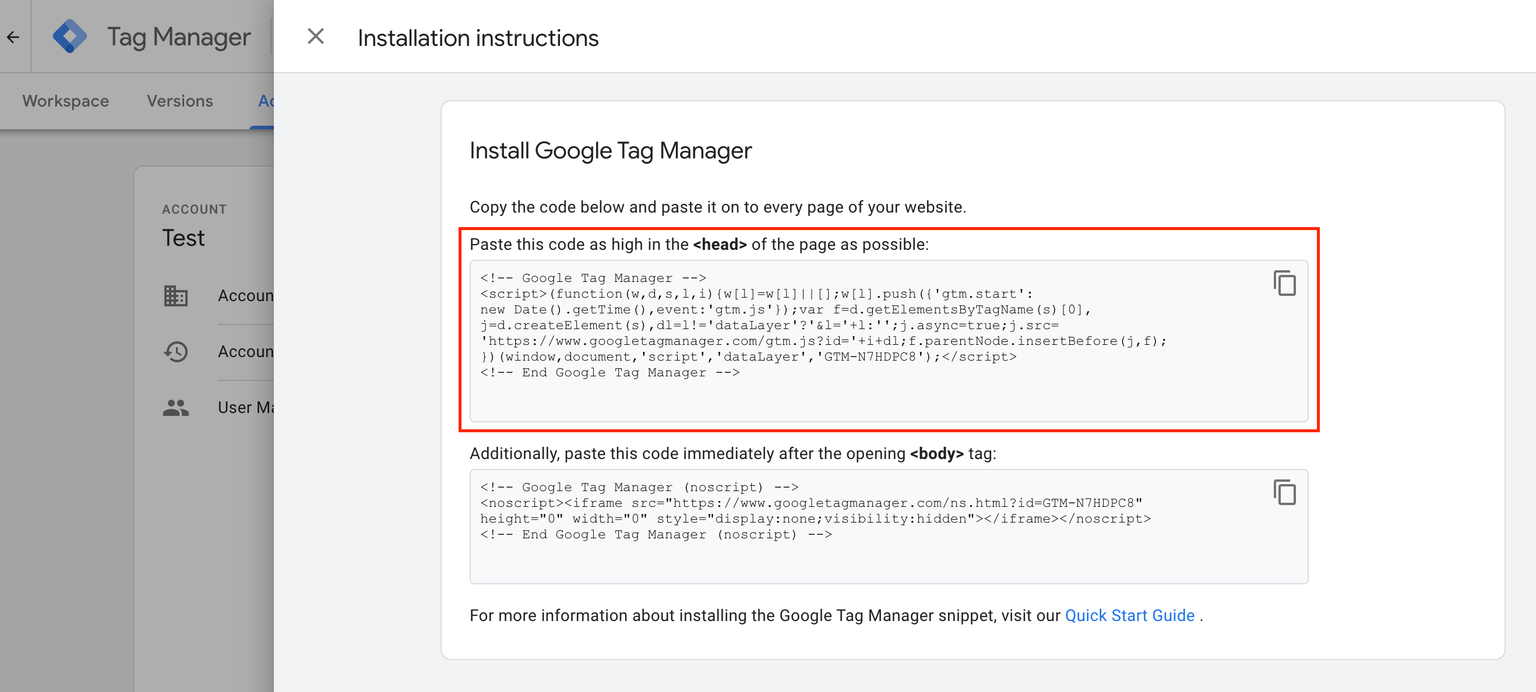
3. Copy the first code of your Google Tag Manager
4. Go to Checkout Page and click on your checkout
5. Open Settings and paste the tag under Tracking pixels
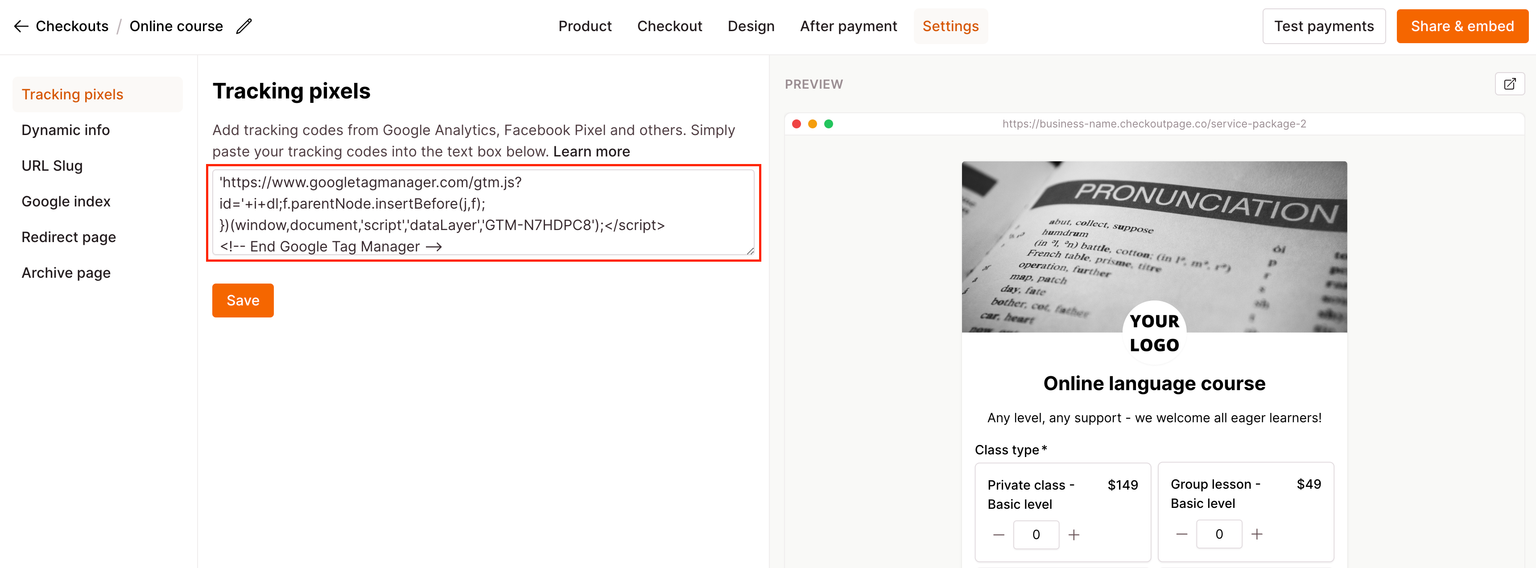
6. Click to Save and that’s it!
Take a look at these articles to further configure the event tracking for your checkouts: