Test payments on Checkout Page
In this help article, you will learn how to make a test payment on Checkout Page before sharing your checkout.
We recommend that you test payments first before sharing your one-page checkouts with your customers.
Why make a test payment?
Making test payments gives you the peace of mind that your checkout is working as expected.
- Check that your product and pricing information is correct
- Check if you’re capturing the right customer and checkout information
- Demo your customer’s checkout and after-payment experience for yourself
- Test integrations with Checkout Page, Stripe, and other third-party services
Test payment checklist
We suggest the following steps:
- Create a checkout
- Make a test payment
- Review your after-payment confirmation message, confirmation email, and checkout redirect
- Review your checkout payment page to check you are capturing the right information and required fields are set to required
- If needed, change your checkout’s product info, pricing, variants, downloads, fields, design, and after-payment settings
- When you’re ready, share your checkout with your customers by adding your checkout to your site or by sharing a payment link
How to make test payments
There are three ways to make test payments from Checkout Page before sharing your checkout.
- Make a test payment using the test card
- Apply a 100% discount code to your checkout
- Pay yourself a low amount (like $1)
There is no limit to the number of test payments you can make.
Make a test payment using the test card
The test card acts like a normal credit card but allows you to test making payments without needing to make a real transaction.
- Open your Checkout Page dashboard and click on any checkout
- Navigate to Test payments and complete your checkout fields
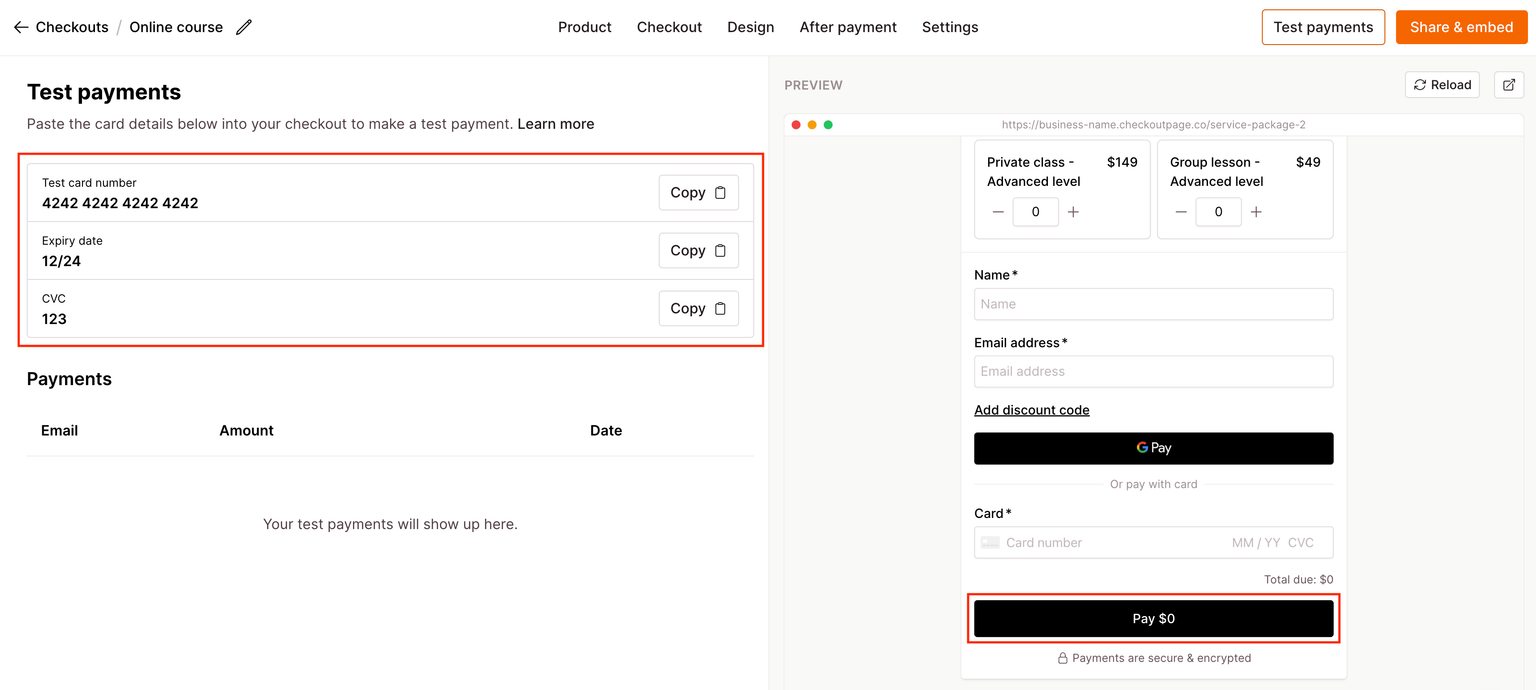
- Paste the test card details into your checkout’s card field and click Pay
- You can leave the Postal code field empty
You can use the test card to test payments for any of your checkouts.
Please note: You can only use Checkout Page’s test card details when you test payment from your Checkout Page dashboard.
Any test payments using the test card details won’t be visible in your payment history.
Learn more about Stripe’s test cards
Pay yourself a low amount ($1)
We recommend this approach to test payments when you need to test with a real transaction.
This is a great way to test that integrations between Checkout Page, Stripe & other third-party services are working together as expected.
There are two ways to do that:
- Apply a discount code to your checkout to pay a low amount
- Change the price of your checkout to a low amount ($1)
Testing form submissions
You can test your form submissions from your Checkout Page preview or your site.
From your Checkout Page dashboard, click on your form page, fill in the details in the preview on the right side and click Submit.
You can view all your test submissions by clicking on Test submissions.
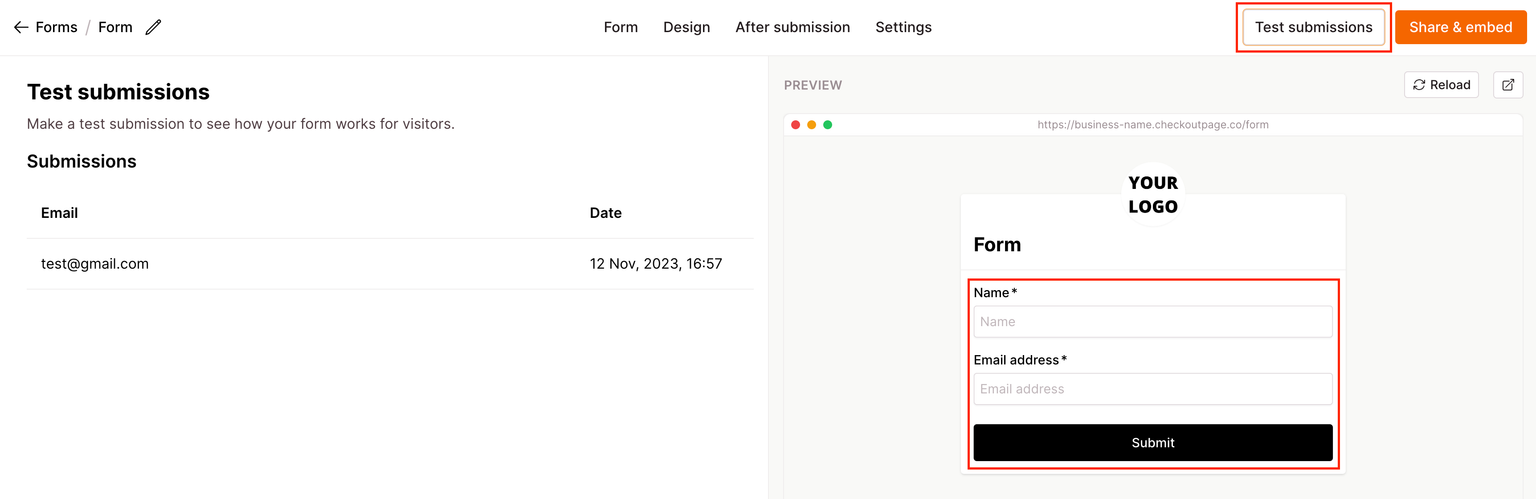
This creates a test submission in the same way as making a test payment would make a test transaction.
What happens after a test payment is made?
- You’ll be shown the checkout confirmation screen
- A new customer will be created under Customers
- The test payment will appear under Payments and be marked as a Test
- You will receive a payment confirmation email
- For test card payments, it will start with [TEST]
- If enabled, a confirmation email will be sent to the email address used during checkout
- For test card payments, it will start with [TEST]
- If enabled, additional payment notifications will be sent to recipients added under Payment notifications
- For test card payments, it will start with [TEST]
- If enabled, our Zapier integration will trigger actions in third-party apps