Add Google Analytics (GA4) to Checkout Page
In this help article, you will learn how to add Google Analytics to your checkouts on Checkout Page.
Many sellers choose to use Google Analytics to better understand their customers and improve the conversion rate of their checkouts.
It is a great way to collect data about your customers’ behavior and identify trends that would let you make data-driven decisions.
Using Google Analytics, Checkout Page will automatically track the purchase event. The purchase event will show as a conversion in the Monetization section in your Google Analytics dashboard.
The purchase event contains:
value- one time payments: total amount paid, including setup fee, variants and discounts
- subscriptions: product price, excluding setup fee, variants, discounts
currencytransaction_id: order IDcoupon: coupon codeitemsitem_id: product sku or product IDitem_name: product nameprice: product price
How to add Google Analytics to Checkout Page
Here’s how to add Google Analytics to your Checkout Page:
- Open your Google Analytics dashboard and select the property you want to use
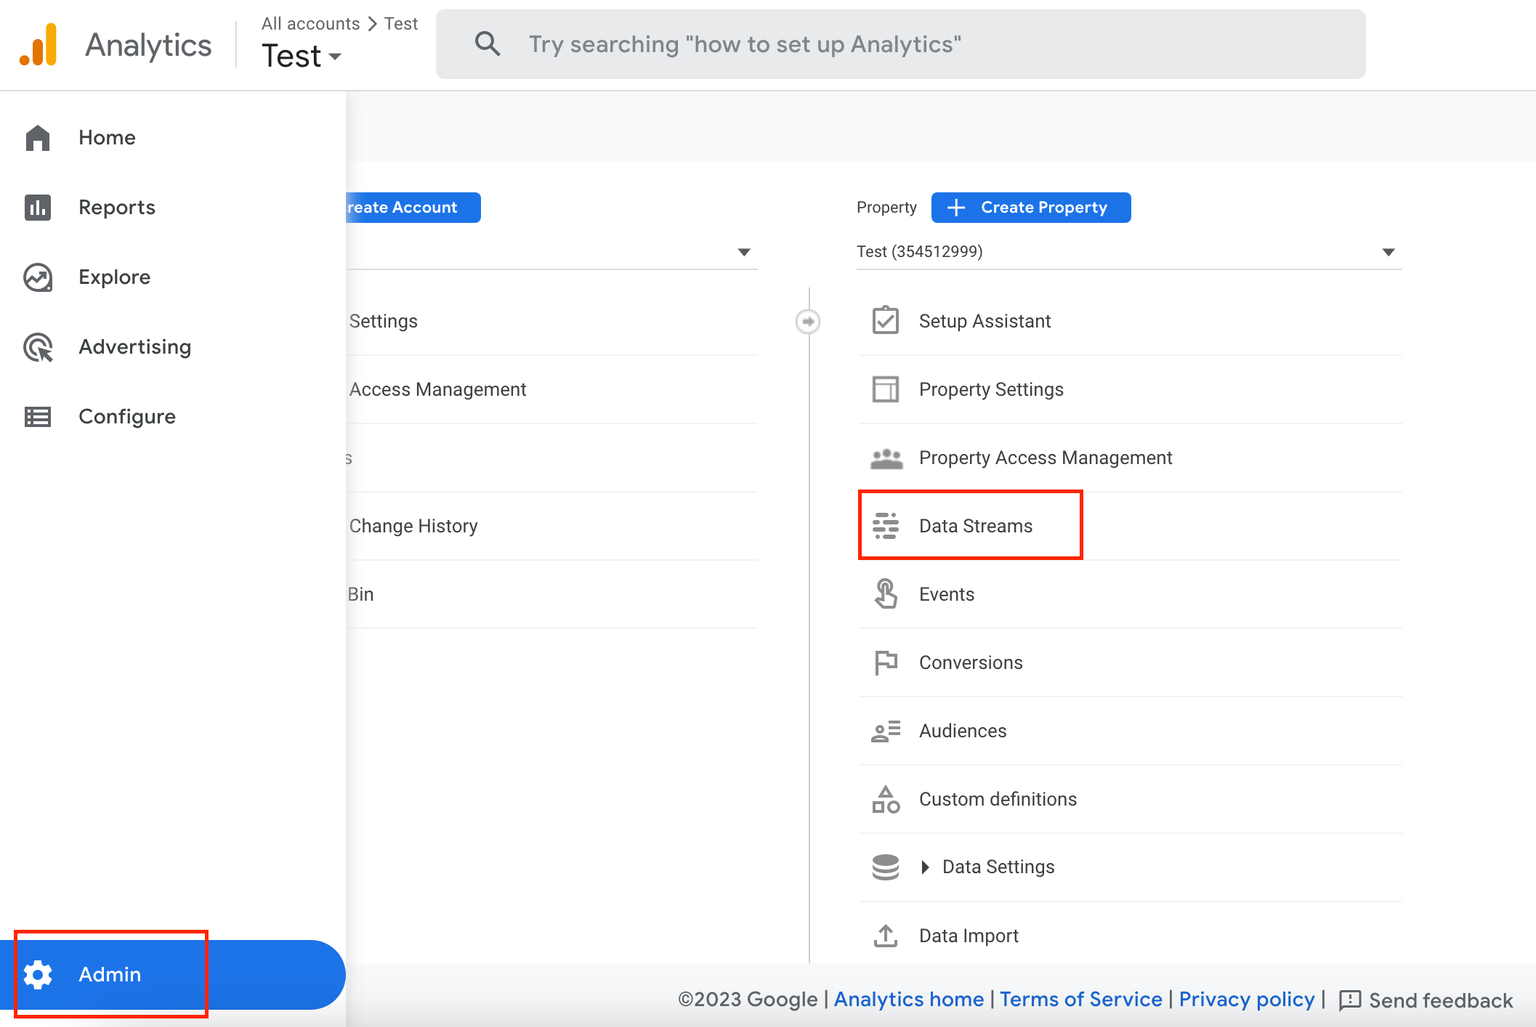
- Navigate to the Admin tab on the bottom left menu and open Data Streams

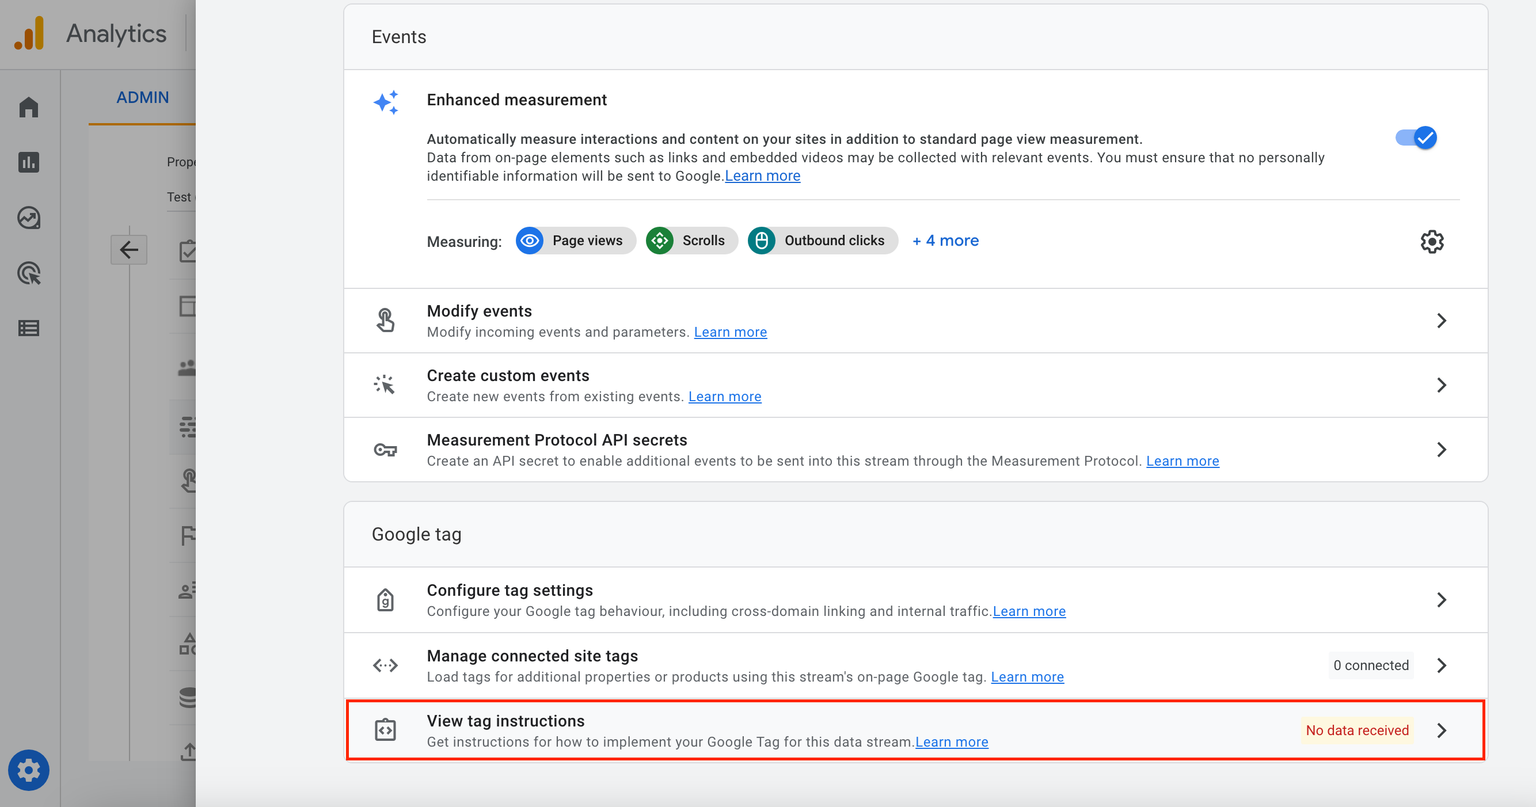
3. Click on your stream and scroll down to View tag instructions

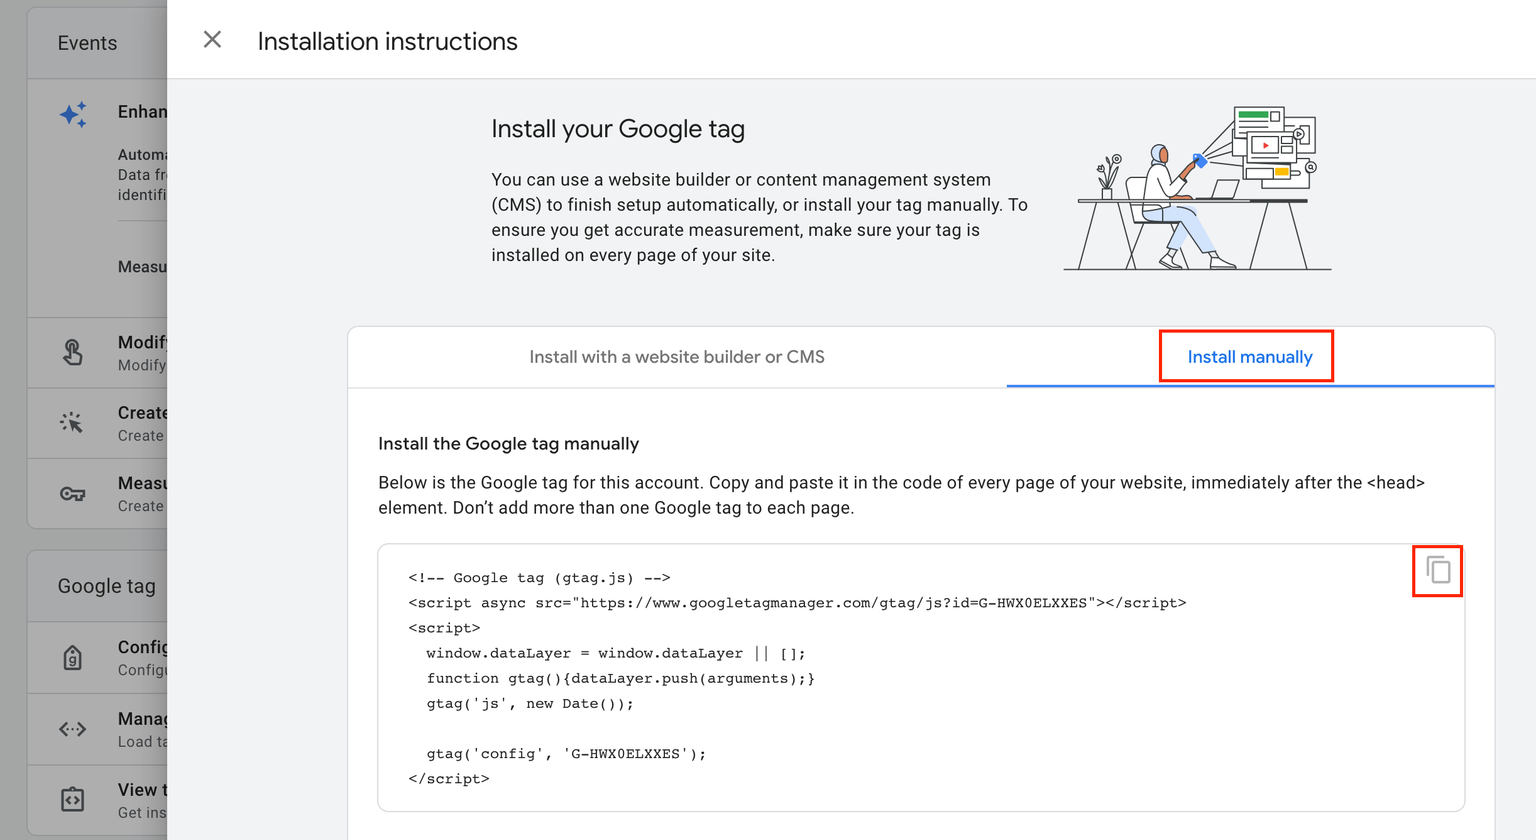
4. Choose Install manually and copy your Google Tag

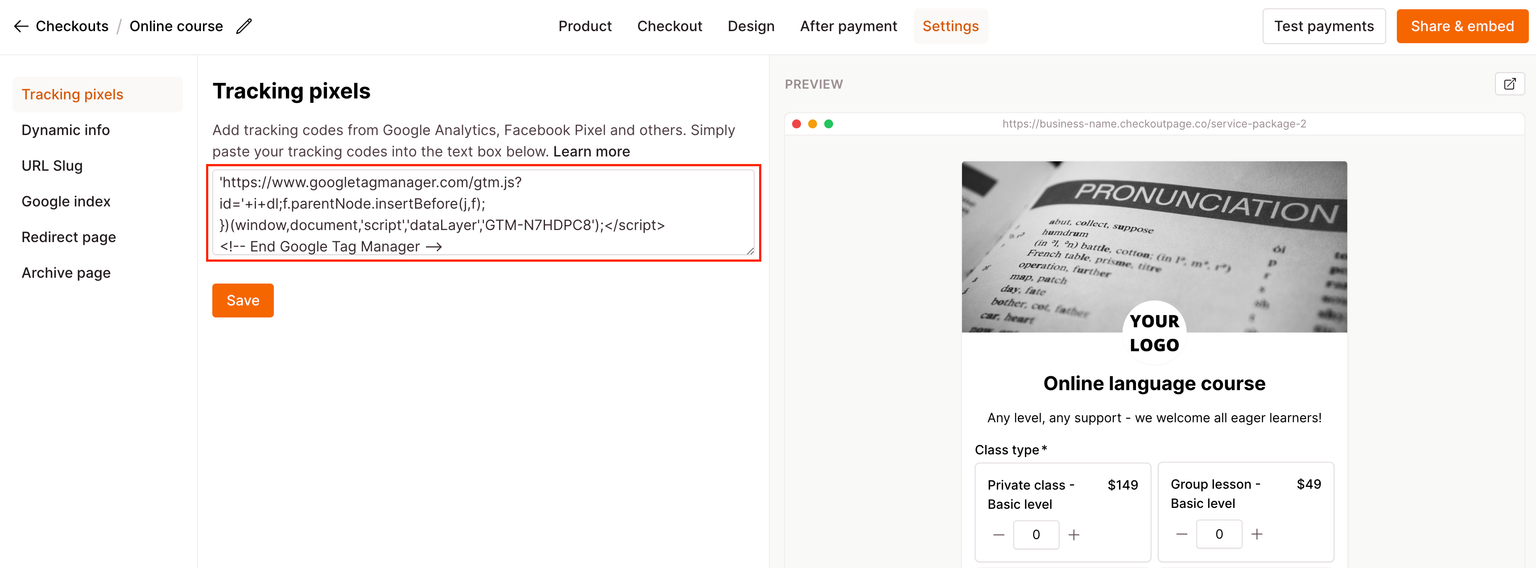
5. Go to Checkout Page and click on your checkout
6. Open Settings and paste the tag under Tracking pixels

7. Click to Save and that’s it!
It can take 24-48 hours for purchases to show up in your Google Analytics dashboard. You can see new purchases (within 30 minutes) in the Realtime view.
To trigger a purchase event, you can make a test payment from your site or the payment link.
Take a look at these articles to further configure the event tracking for your one-page checkouts: