Track events from embed & pop-up checkouts using your site’s Google Tag Manager
In this help article, you will learn how to set up event tracking for your embed & pop-up Checkout Page checkouts using your site's Google Tag Manager.
You can easily track events from your one-page checkouts.
If you don’t want to add your Google Analytics or Google Tag Manager script to your checkouts, and instead want to pass the events on to your site’s Google Tag Manager instance, you can simply add a script to your website.
Step 1: Add a script to your website
This script allows you to listen to the events tracked by Checkout Page and push those events to your Google Tag Manager instance.
Checkout Page will automatically track two custom events:
- enter - whenever someone enters your checkout
- checkout - whenever someone completes your checkout
You can see the events categorized under the event name: checkoutpage-{{checkoutId}}.
Each of the checkout events will also contain:
- value - the final purchase amount
- checkoutID - the ID of your checkout
- currency - the currency of your checkout
- orderId - the ID of your customer’s order
You can add the following script to your site, or you can add it as a Custom HTML tag in Google Tag Manager:
<script type="text/javascript">
 window.addEventListener("message", function (event) {


   // check if event is from Checkout Page
   if (event.data.type && event.data.type === "checkoutpage.event") {


     // track checkout event
     if (event.data.payload.event === "checkout") {
       window.dataLayer.push({
         event: event.data.payload.event,
         checkout: event.data.payload.checkoutId,
         value: event.data.payload.value,
         currency: event.data.payload.currency,
         orderId: event.data.payload.orderId,
       });
     }


     // track other events
     if (event.data.payload.event !== "checkout") {
       window.dataLayer.push({
         event: event.data.payload.event,
         checkout: event.data.payload.checkoutId,
       });
     }
   }
 });
</script>
Step 2: Add a trigger to track Checkout Page events in Google Analytics
You also need to create a trigger to ensure your Google Analytics tag tracks your Checkout Page events.
Here’s how to do it:
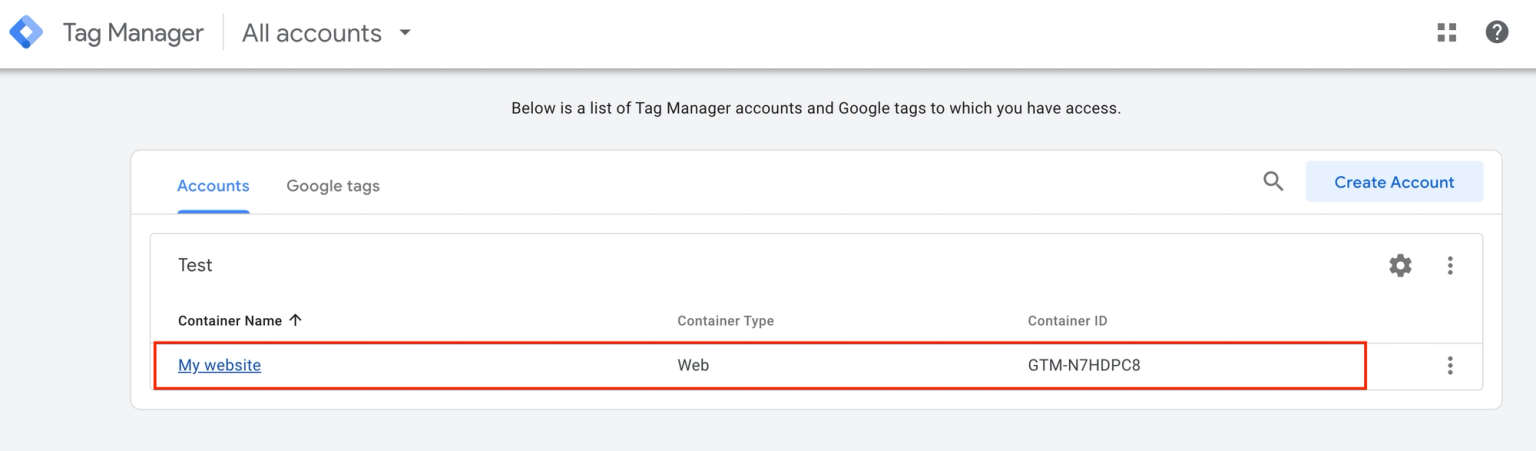
- Open your Google Tag Manager dashboard and click on your container
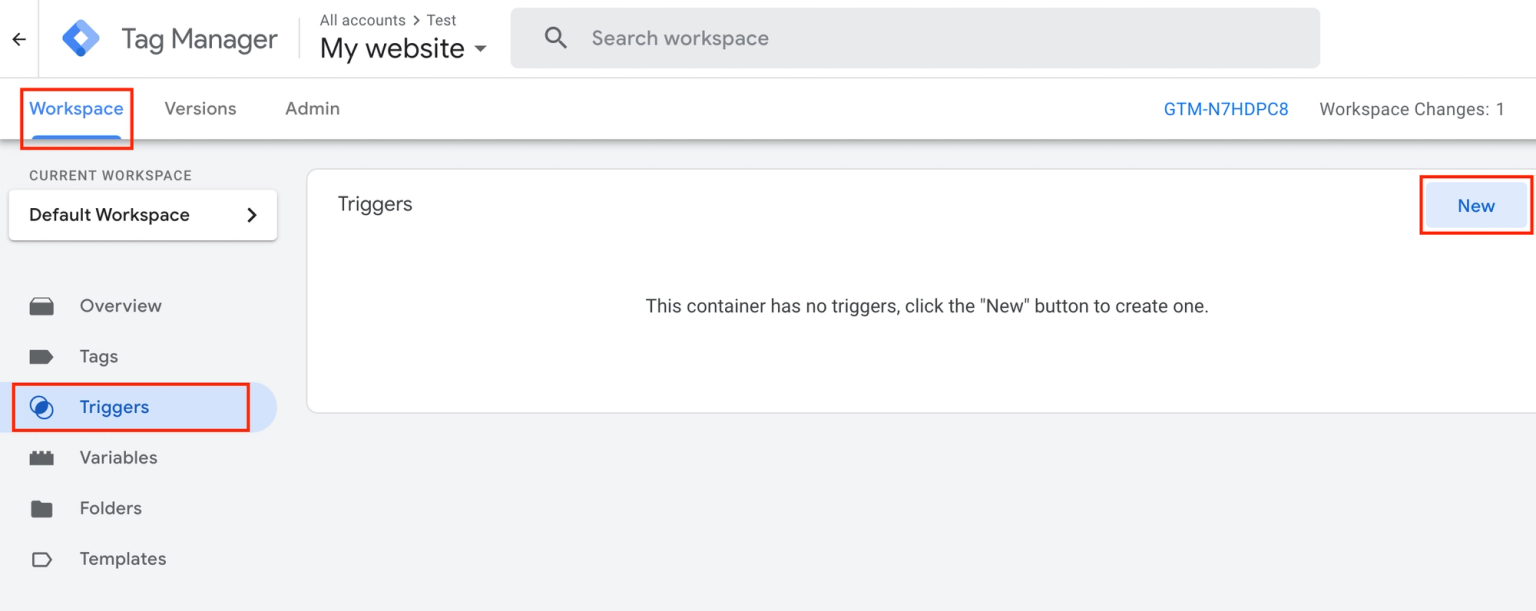
- Under the Workspace tab, go to Triggers from the left-hand menu to add a new trigger by clicking on New
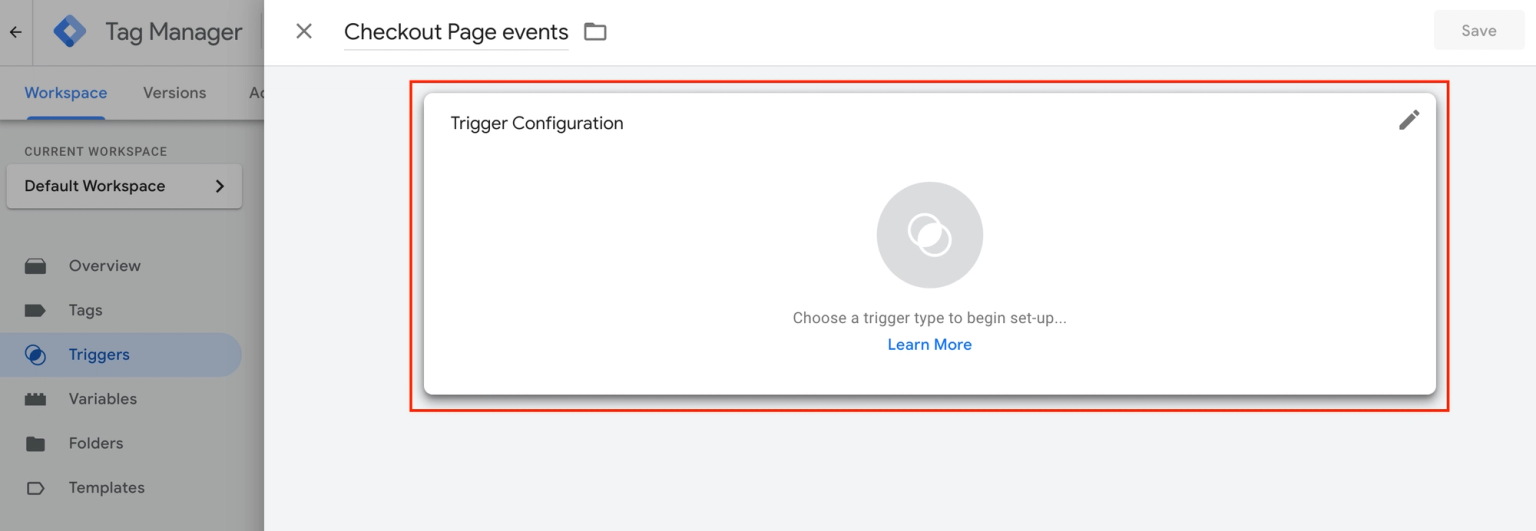
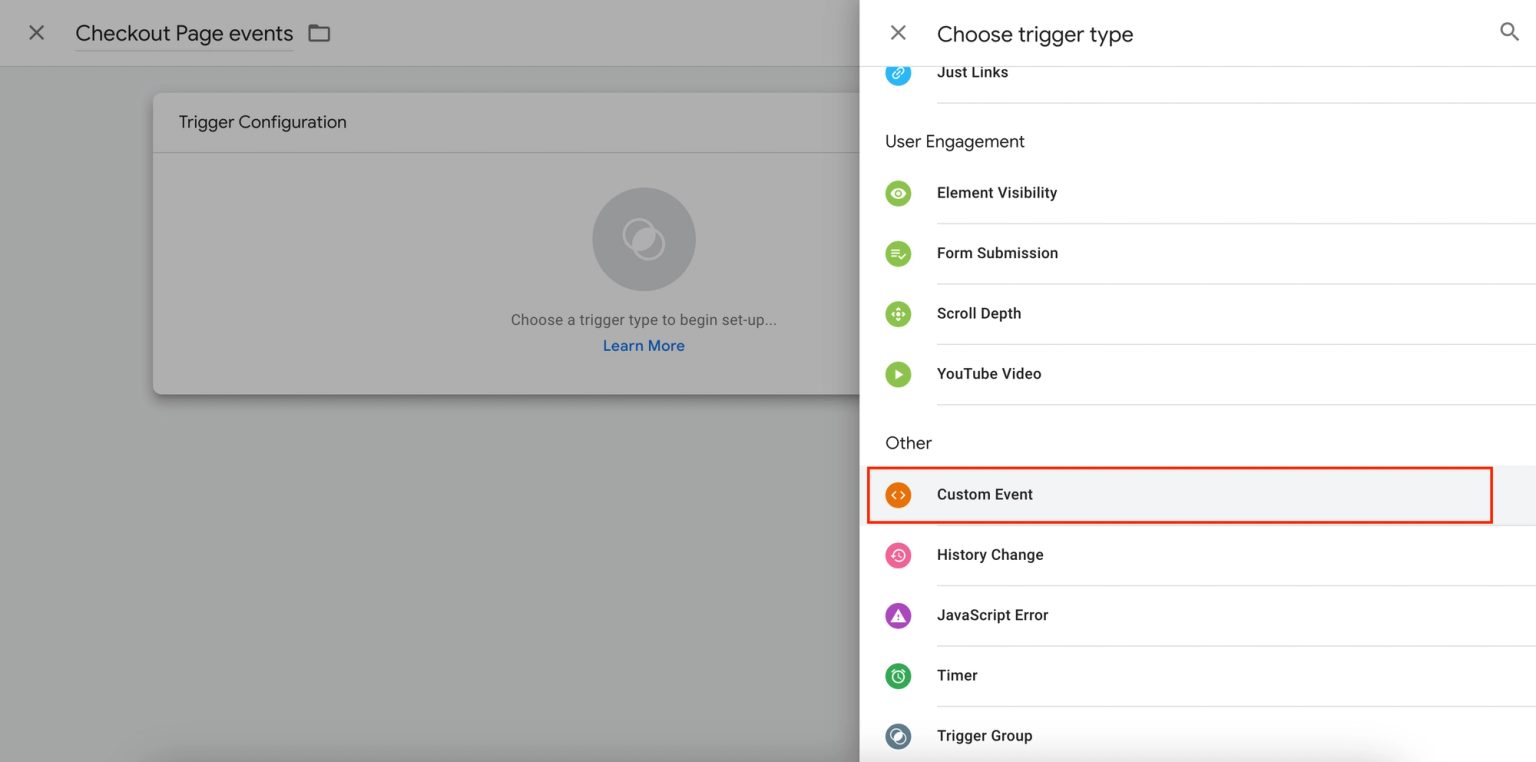
- Click on Trigger configuration and choose Custom event as the trigger type
- Now you have two options for the Event name:
- Set Event name to checkoutpage-* to track all Checkout Page events and turn on Use regex matching
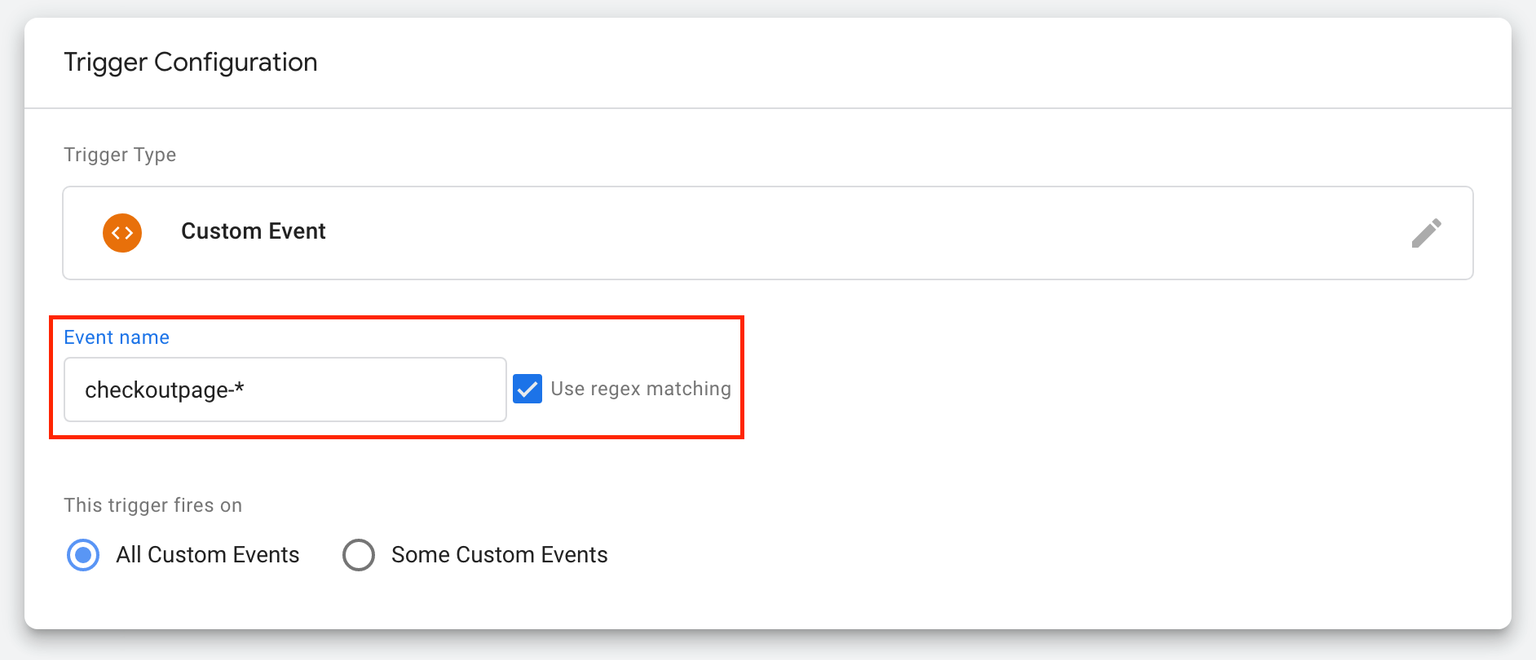
- Set Event name to checkoutpage-checkout to only track conversion event

- Once you’ve entered your preference, name your trigger as Checkout Page Events and click Save to go to the next step
Step 3: Add an Event tag to report event data to Google Analytics
Once you’ve set up all your events and triggers, it is important to add a Google Analytics Event tag that reports all the collected data back to you.
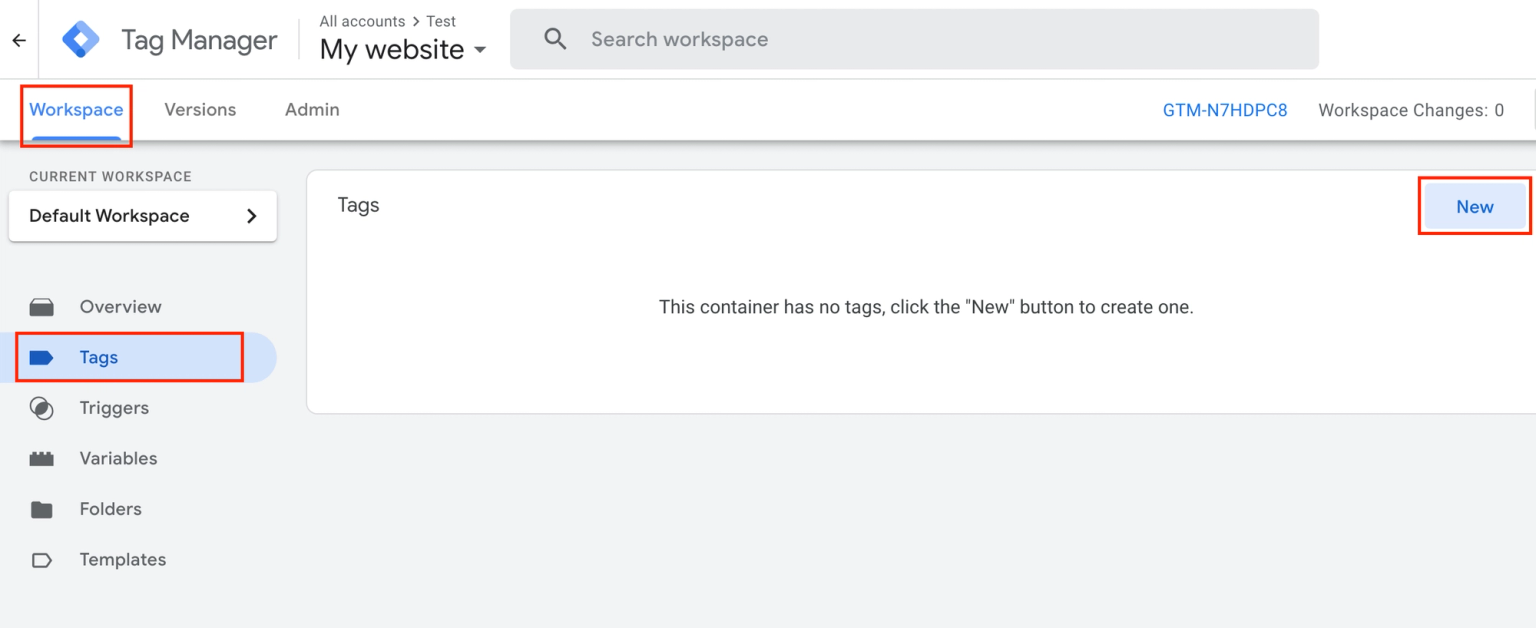
- Open your Google Tag Manager dashboard and click on your container
- Under the Workspace tab, go to Tags from the left-hand menu to add a new tag by clicking on New
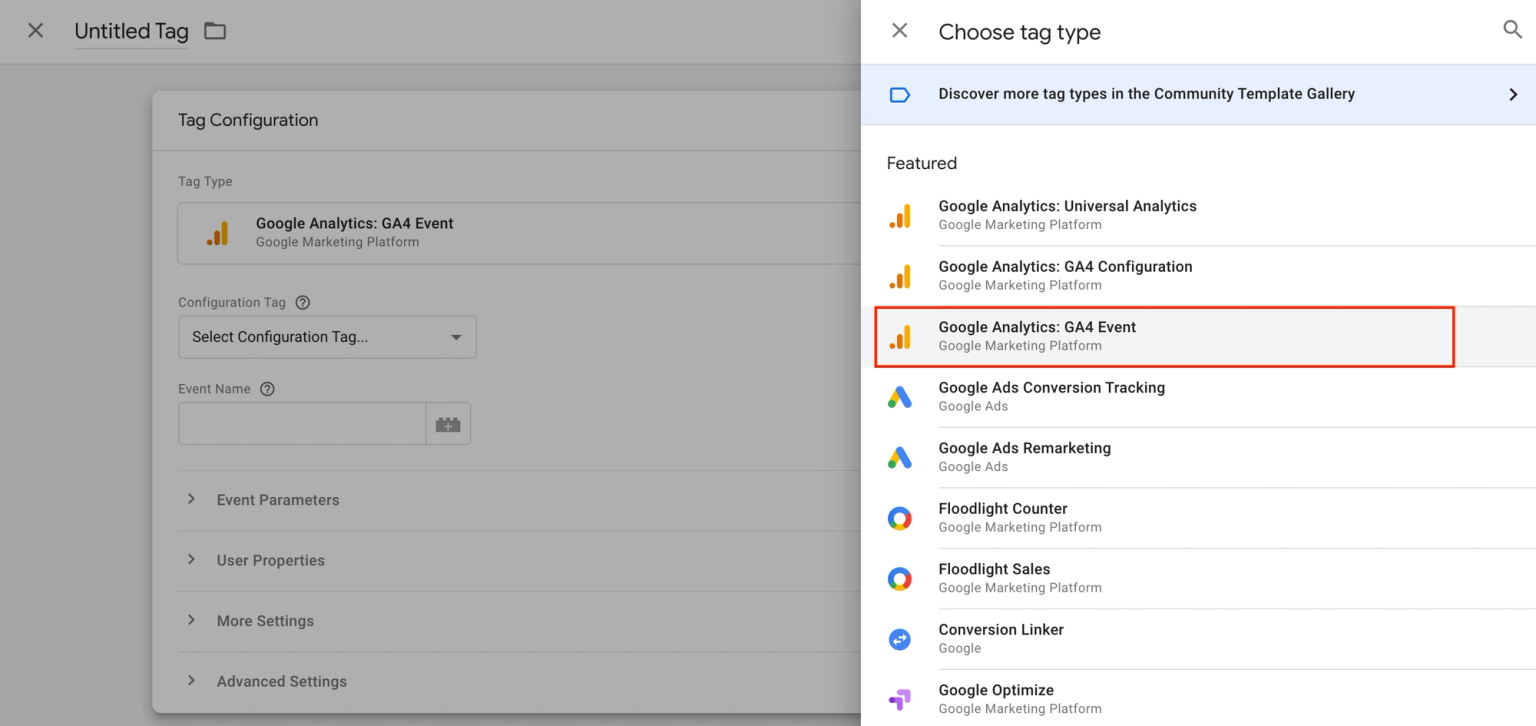
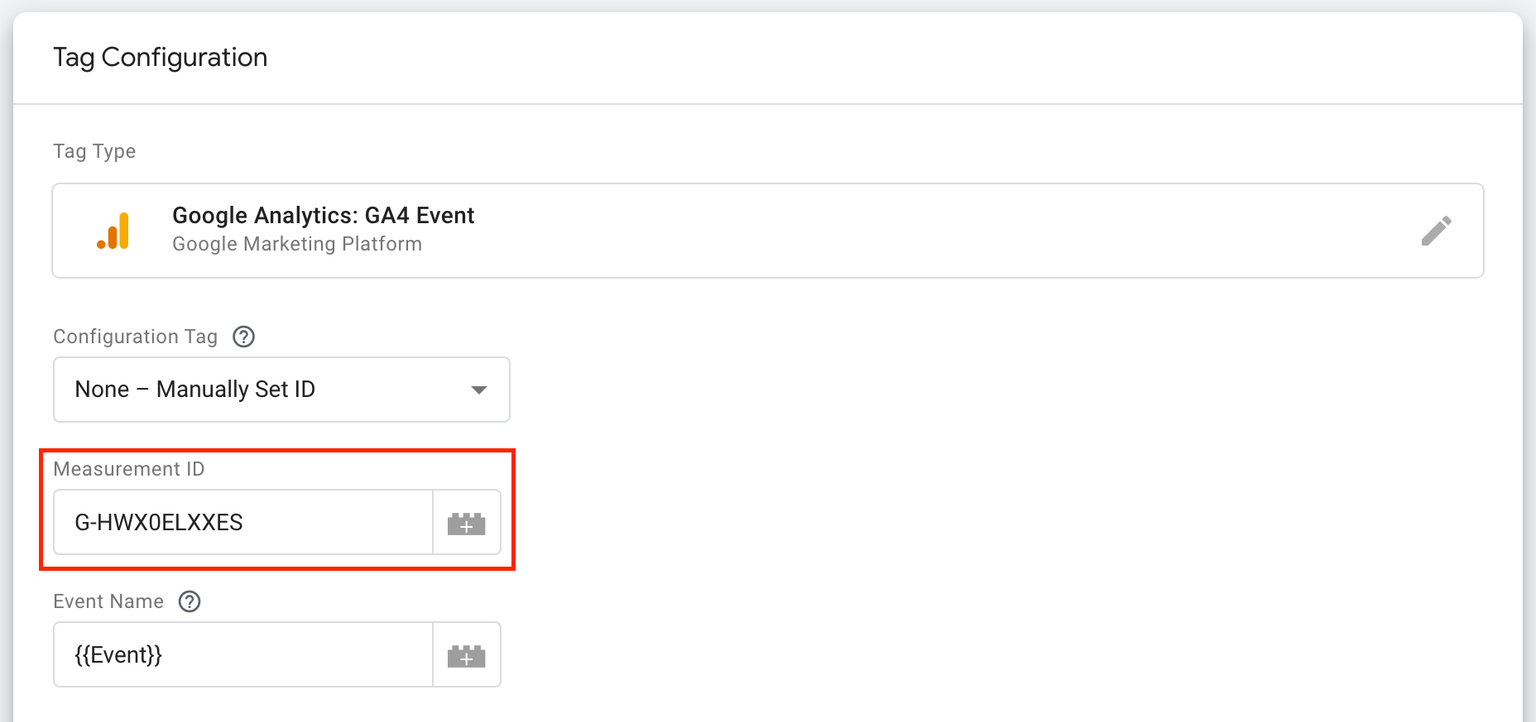
- Click on Tag configuration to choose Google Analytics: GA4 Event as the tag type
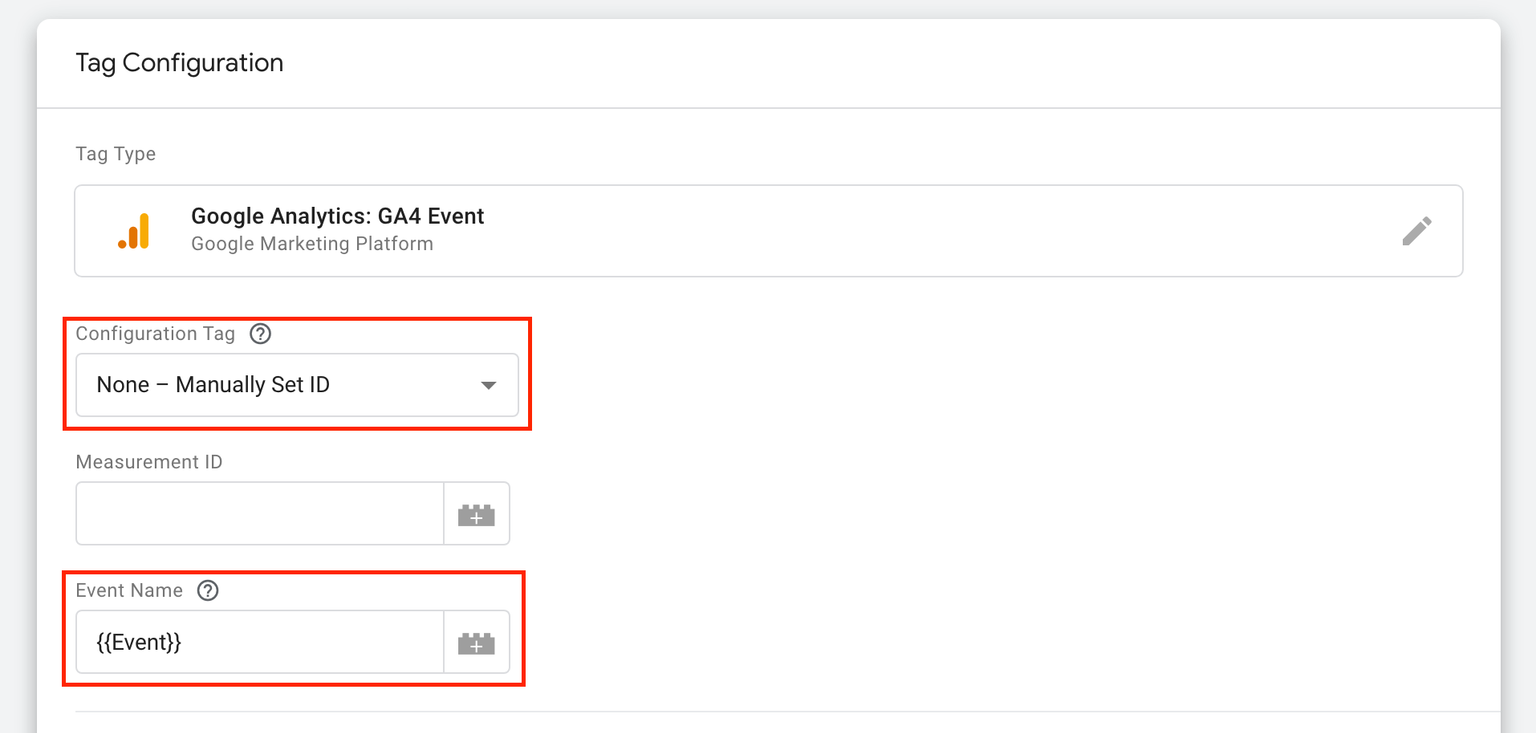
- Choose None – Manually Set ID and type {{Event}} as the Event name
- Open your Google Analytics dashboard and go to Admin from the left-hand menu
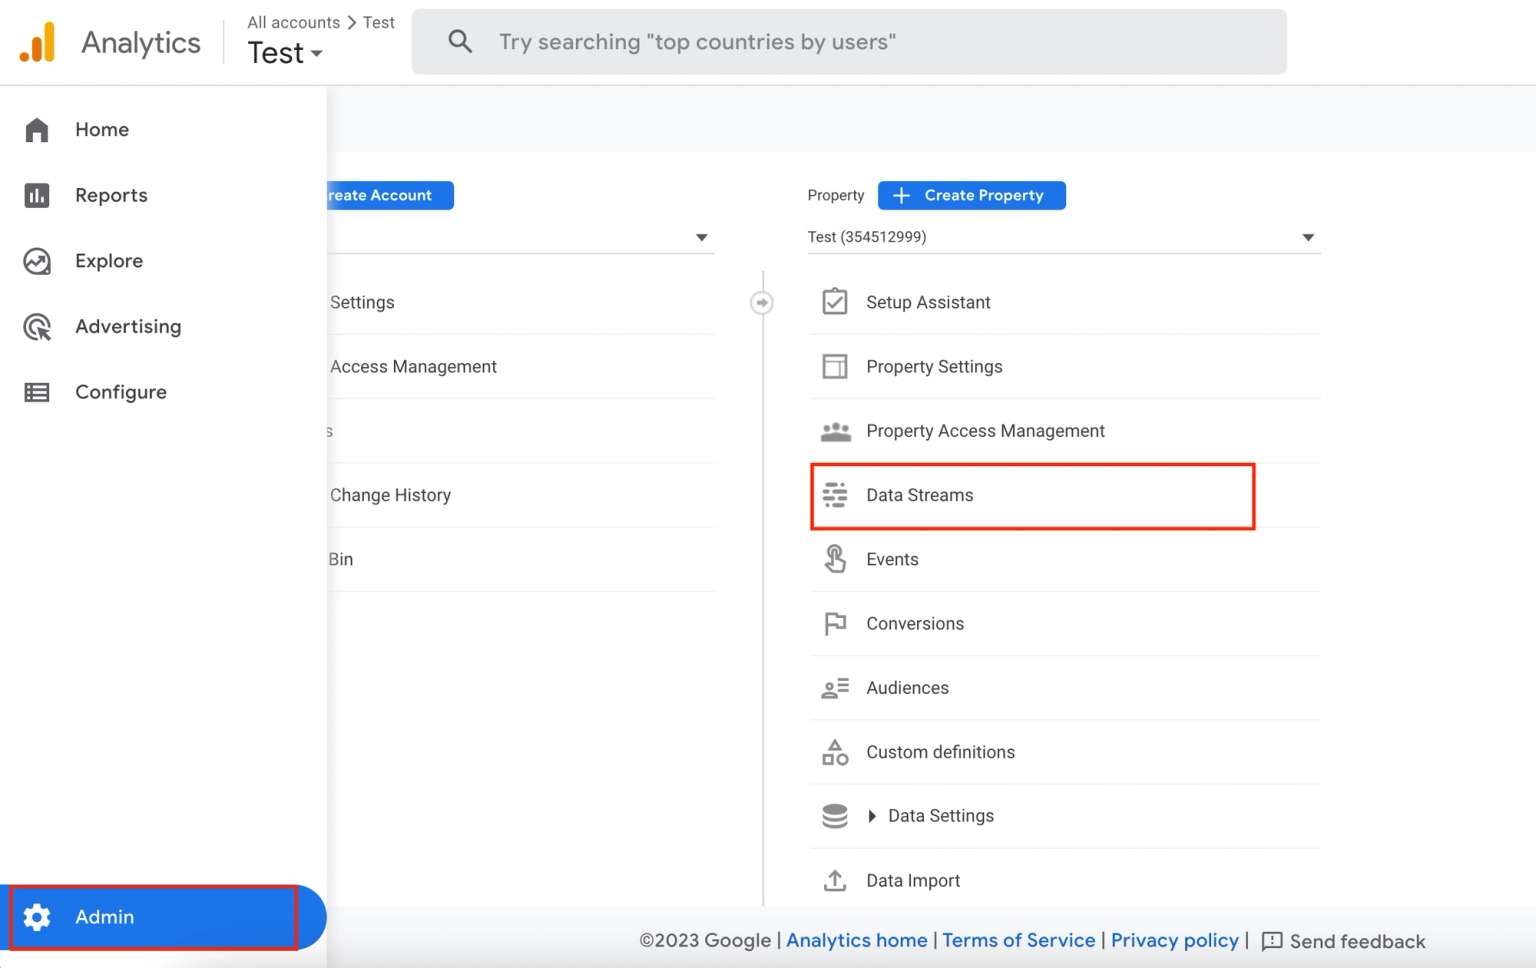
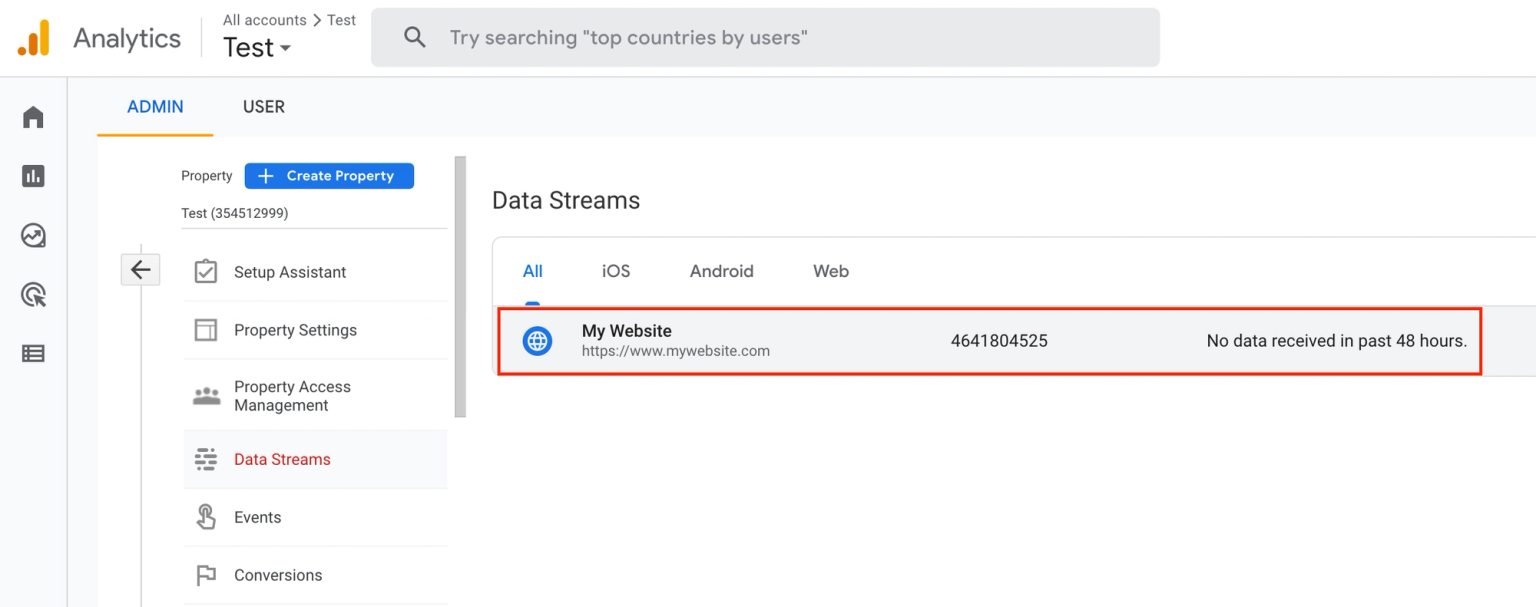
- Select Data streams and click on your data stream
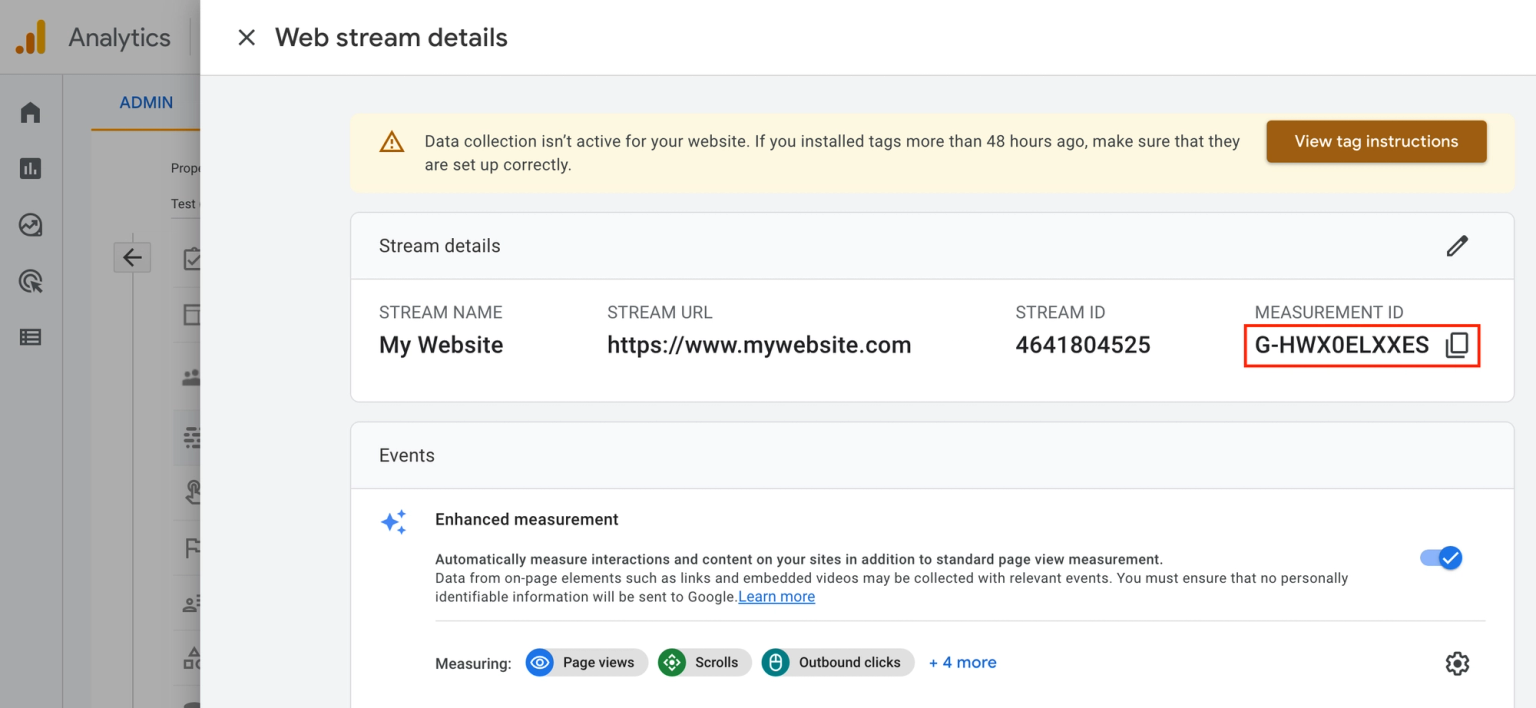
- Copy the Measurement ID
- Paste it into the Measurement ID field on Google Tag Manager
- Scroll down to click on Triggering to choose the trigger (Checkout Page Events) you created in Step 4
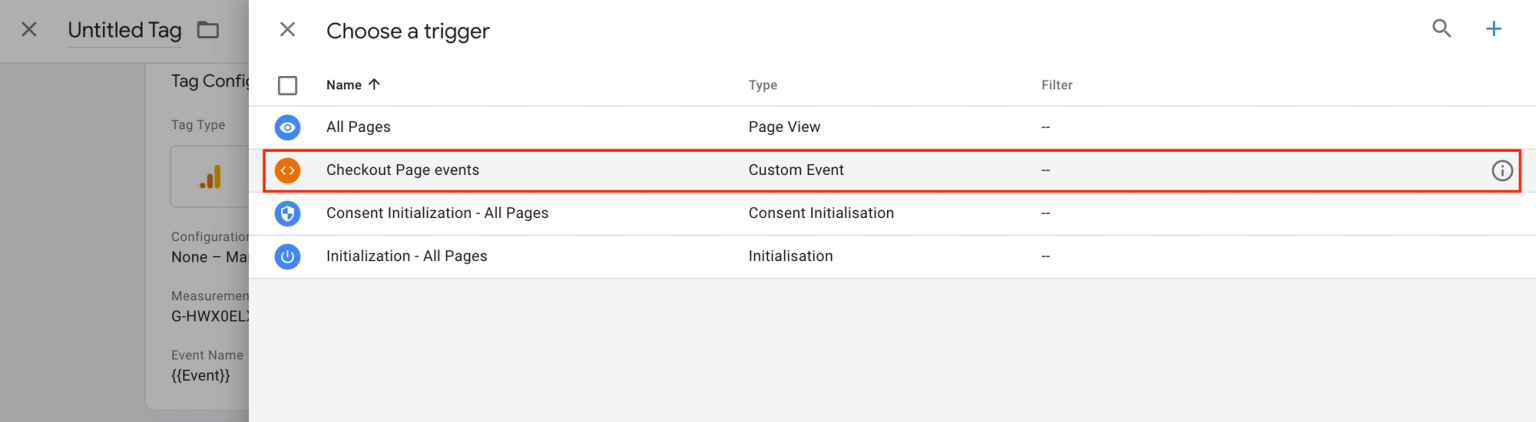
- Finally, Save your tag and that’s it!
Most importantly, remember to test your tag to make sure that all data is tracked and monitored correctly on your Google Analytics account.
Take a look at these articles to learn more about Google Analytics and Google Tag Manager: