How to test payments from your site or payment link
In this help article, we’ll cover how to make a test payment on your site or using a payment link.
Before sharing your checkout with your customers, it is important to ensure that live payments work.
To test a live payment after sharing your one-page checkout, we recommend applying a discount code to pay yourself a low amount (e.g. $1).
Alternatively, you could directly change the price of your checkout to a low amount, like $1.
Apply a discount code to your checkout to pay a low amount
We recommend this approach to test payments when you wish to test your checkout with coupon codes.
- Create a coupon code. Learn how to create a coupon code here
- Set your Amount off to your checkout price minus $1 or Percentage off to 99%
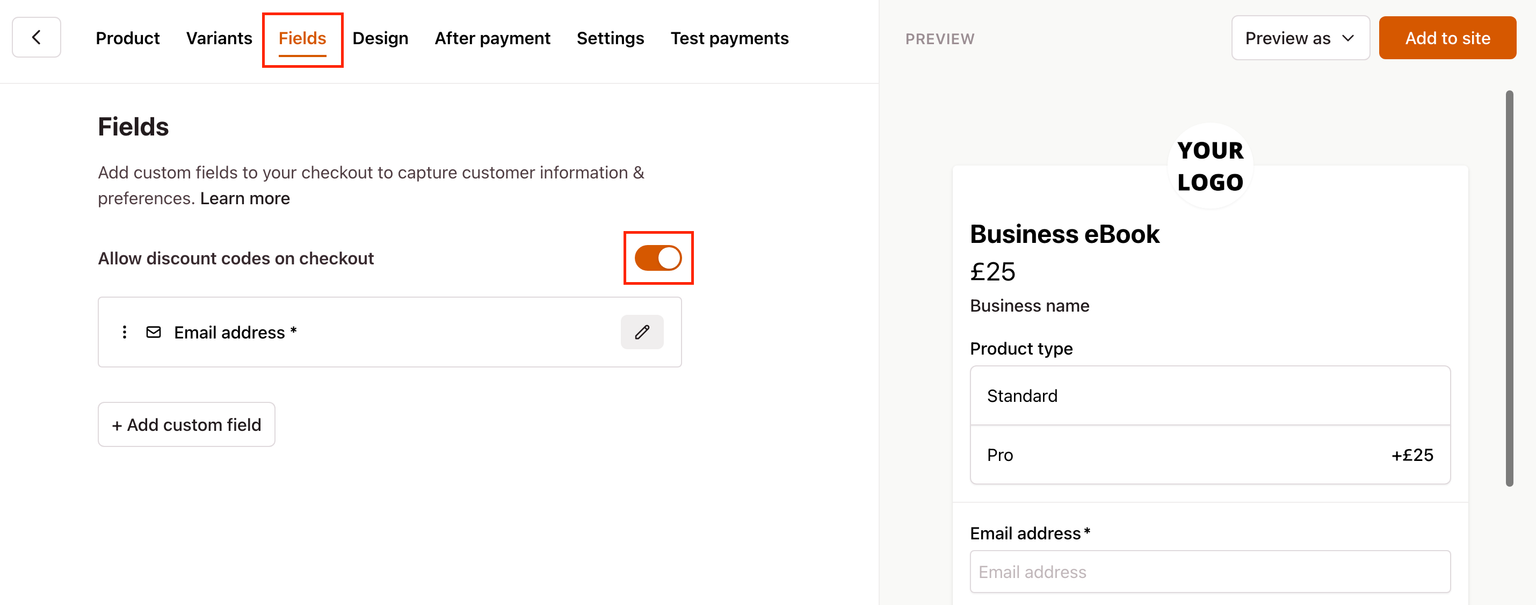
- From your Checkout Page dashboard, click on any checkout or create a new one
- Go to the Fields tab and turn on Allow discount codes on checkout
- This will show a discount code box on your checkout
- Click Add to site and open your checkout as a Payment link
- Complete your checkout fields and enter your discount code
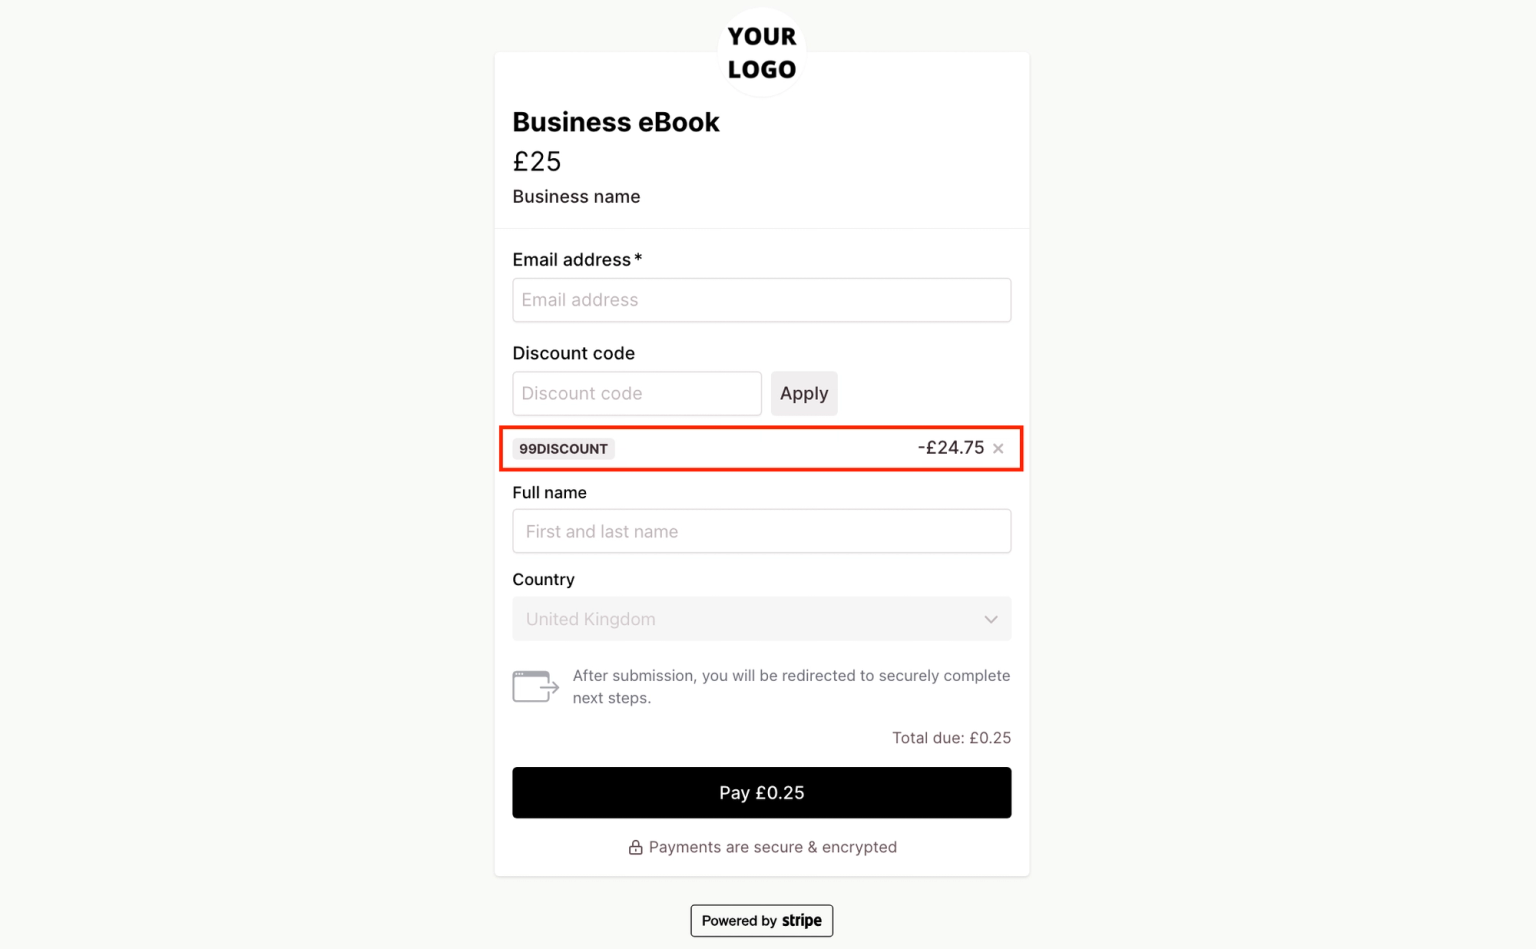
- Enter your payment details into the card field and click Pay
That’s it, you’ve just made a test payment applying a discount code.
Change the price to a low amount ($1)
This is a great way to test that integrations between Checkout Page, Stripe & other third-party services are working together as expected.
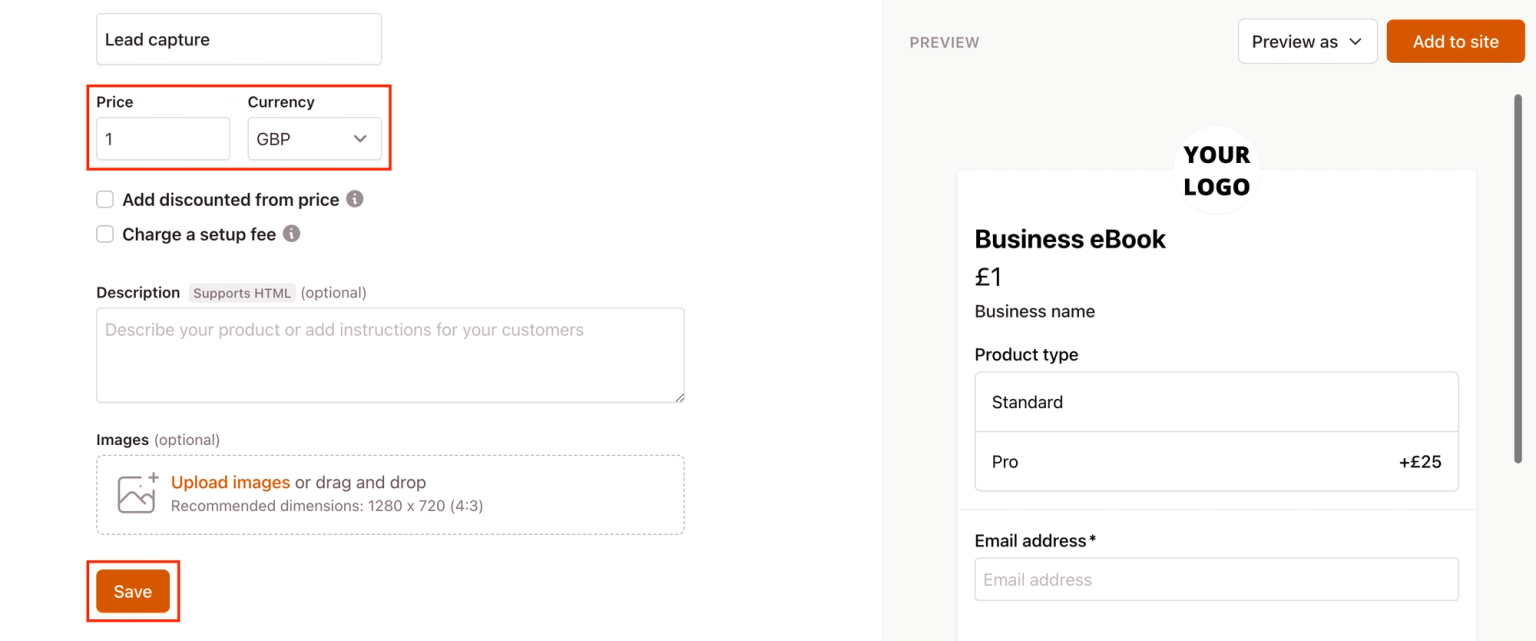
- From your Checkout Page dashboard, click on any checkout or create a new one
- Set your checkout Price to a low amount (like $1) and scroll down to Save
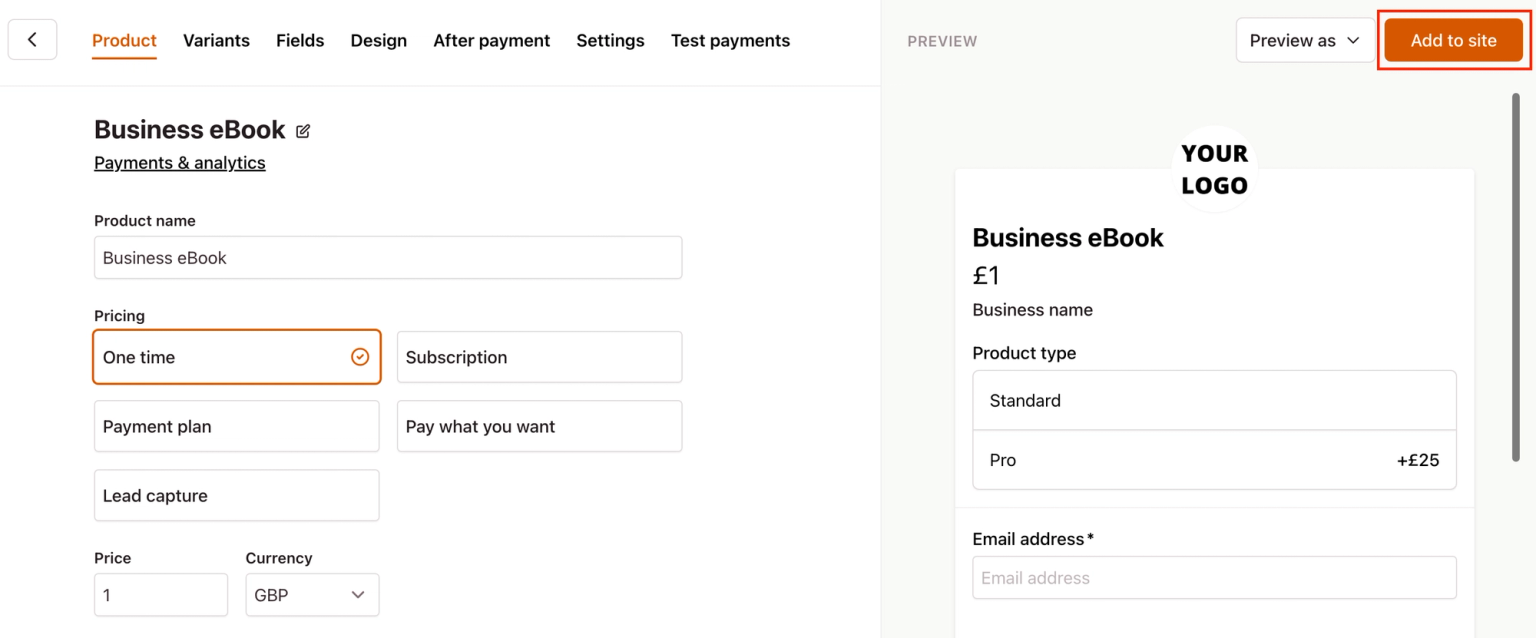
- Add your checkout to your site
- From your site, complete your checkout fields and click the Pay button
Remember to change the price back after you’ve finished testing.
Testing integrations
If you’re testing integrations with Checkout Page, Stripe, & another third-party service, we recommend paying yourself a low amount ($1) after adding your checkout to your site or using the payment link.
This is the most reliable way to test integrations.
What happens after a test payment is made?
- You’ll be shown the checkout confirmation screen
- A new customer will be created under Customers
- A payment will appear under Payments
- You will receive a payment confirmation email
- If enabled, a confirmation email will be sent to the email address used during checkout
- If enabled, additional payment notifications will be sent to recipients added under Payment notifications
- If enabled, our Zapier integration will trigger actions in third-party apps