Add Checkout Page to Framer
Sell services, products, subscriptions and events on Framer sites. Learn how to embed checkouts, add checkout pop-ups and add payment links. No coding needed.
We’ve made it easy to embed one page checkouts on your Framer site to sell products, services, subscriptions and events.
There are 3 ways to add one page checkouts to your Framer site:
- Buy button
- Checkout popup
- Checkout embed
While the buy button is easy to set up (just a minute or so), the checkout embed and popup take the payment experience to the next level.
Let’s dive in!
Add a Buy button
With the Buy button, the checkout will open on its own page, in the same or in a new tab.
- Open your Framer site
- Add a button or select a button on your site
- Click Link from the editor panel
- Go to your Checkout Page dashboard and open a checkout
- Click Add to site and copy the payment link
- Return to Framer and paste the payment link into the Link setting
- Choose to open the link in the same or new tab
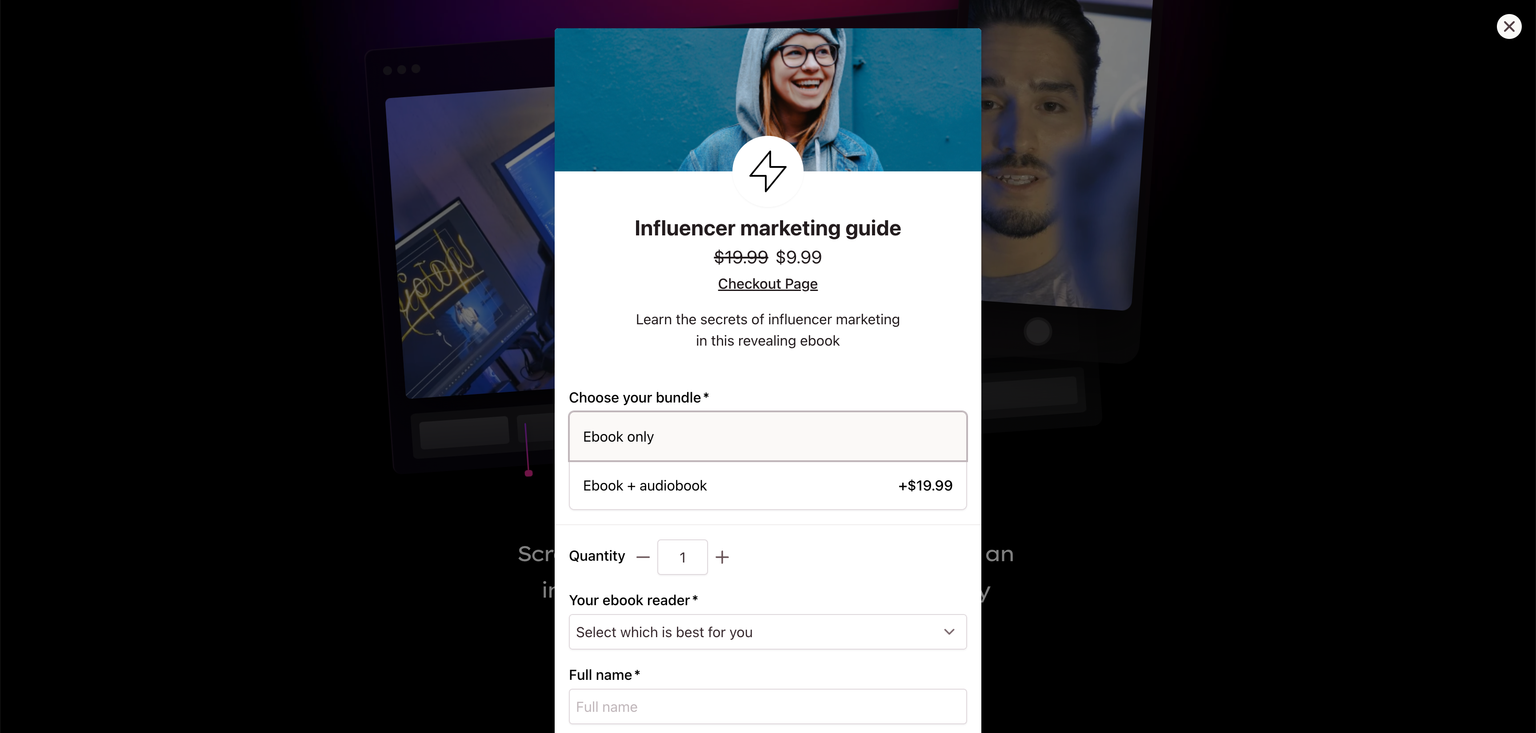
Add a pop-up checkout
By adding a pop-up one page checkout, you can let your customers complete their purchases without leaving your site.
The checkout pop-up works with a code override. First, we’ll add the code override to your site:
- Open your Framer site
- In the left panel, open the Assets tab
- In the Code section, click the + icon to add a new code component
- Give it the title CheckoutPopup and choose New override
- Copy and paste the below code
- Save the file ^
import { useEffect, useRef, useCallback } from "react"
import type { ComponentType } from "react"

declare global {
    interface Window {
        checkoutPage: any
    }
}

function useEmbed() {
    useEffect(() => {
        if (window?.checkoutPage) return

        const script = document.createElement("script")

        script.src = "https://checkoutpage.co/js/overlay.js"
        script.async = true

        document.body.appendChild(script)

        return () => {
            document.body.removeChild(script)
        }
    }, [])

    return null
}

export function withCheckoutPopup(Component): ComponentType {
    return (props: { className }) => {
        useEmbed()

        props.className += " cp-button"

        return <Component {...props} />
    }
}
After adding the CheckoutPopup code override, we’ll add the checkout pop-up to your site:
- In the left panel, click the Pages tab
- Open the page you want to add the checkout pop-up to
- Add a button or select a button on your site
- In the right panel, navigate to the Link setting
- Go to your Checkout Page dashboard and open the checkout you want to add
- Click Add to site and copy the payment link
- Return to Framer and paste the payment link into the Link setting
- Set New Tab to No
- In the right panel, scroll down to Code Overrides and click to open the panel
- For File, select CheckoutPopup
- For Override, select withCheckoutPopup
- Click Preview and click your button, it now opens the checkout in a pop-up!
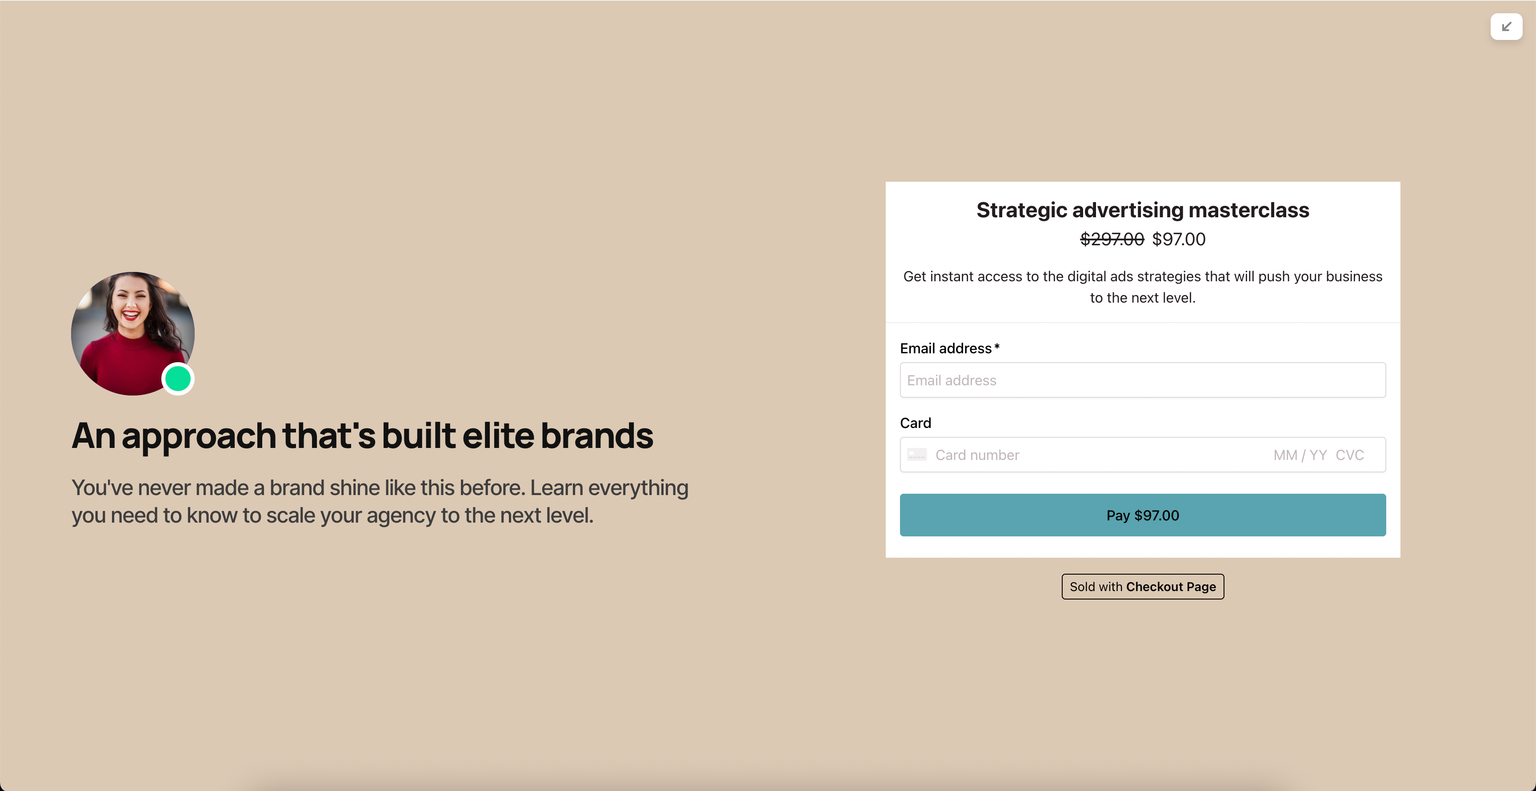
Embed your checkout
The checkout embed lets you sell directly on your site with an embedded checkout form. It’s perfect for a two-column section, combined with conveying copy and images, or as a standalone section.
The checkout embed works as a custom code component. First, we’ll add the custom code component to your site:
- Open your Framer site
- In the left panel, open the Assets tab
- In the Code section, click the + icon to add a new code component
- Give it the title CheckoutEmbed and choose New component
- Copy and paste the below code
- Save the file. You should now see an example checkout in the Preview panel! ^
import { useEffect } from "react"
import { addPropertyControls, ControlType } from "framer"

declare global {
    interface Window {
        checkoutPage: any
    }
}

function useEmbed() {
    useEffect(() => {
        if (window?.checkoutPage) return

        const script = document.createElement("script")

        script.src = "https://checkoutpage.co/js/overlay.js"
        script.async = true

        document.body.appendChild(script)

        return () => {
            document.body.removeChild(script)
        }
    }, [])

    return null
}

export default function CheckoutEmbed({
    checkout,
    style,
}: {
    checkout: String
    style: Object
}) {
    useEmbed()

    useEffect(() => {
        window?.checkoutPage?.initEmbeds()
    }, [checkout])

    return (
        <div style={style}>
            <div className="cp-checkout" data-checkout={checkout}></div>
        </div>
    )
}

// Add a form id field in the properties panel
addPropertyControls(CheckoutEmbed, {
    checkout: {
        title: "Checkout",
        type: ControlType.String,
        placeholder: "Your checkout link",
        defaultValue:
            "https://checkoutpage.co/c/examples/customize-this-checkout",
    },
})
After adding the CheckoutEmbed component, we will add the checkout embed to a page. You can add multiple checkout embeds to your site.
Here’s how you add the checkout embed to a page:
- In the left panel, click the Pages tab
- Open the page you want to add the checkout embed to
- In the left panel, click the Assets tab
- From the Code section, drag the CheckoutEmbed.tsx component onto your page. You should now see the example on your page.
- Go to your Checkout Page dashboard and open the checkout you want to add
- Click Add to site and copy the payment link
- Back on Framer, click on the embedded checkout element
- In the right panel, navigate to CheckoutEmbed and paste the payment link in the Checkout field
- Click Preview to see your checkout