Accept payments with card and Apple Pay and Google Pay
Learn how to accept card payment and add Apple Pay & Google Pay to your checkouts
The advantages of using Apple Pay and Google Pay
Accepting Apple Pay and Google Pay can bring numerous benefits to your business, including enhanced security, increased sales, and improved customer experience.
These popular digital wallets allow customers to make purchases quickly and easily, without having to manually enter their credit card information.
What you need to know before using Apple and Google Pay
To use Apple Pay and Google Pay, customers need an eligible device and a supported payment method.
Customers who do not have Apple Pay or Google Pay set up on their devices will not be able to view these options during checkout.
- Apple Pay is available on iPhones, iPads, Apple Watches, and Macs
- Google Pay can be used on Android phones and smartwatches.
- Customers can add credit or debit cards to their Apple Pay or Google Pay wallet, as well as linked bank accounts.
Using Apple Pay and Google Pay on embed and pop-up checkouts
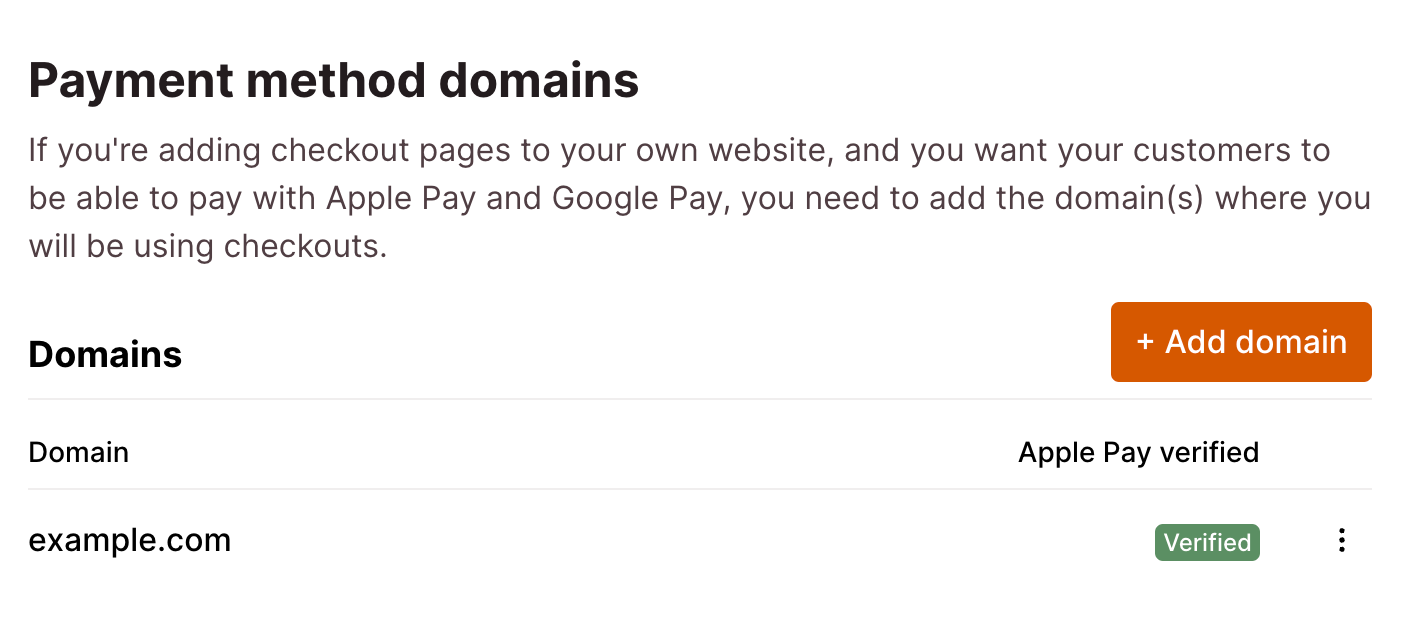
To enable Apple Pay and Google Pay on checkouts that are added to your website, you need to register your domains.
Go to Payment method domains in the dashboard and add all domains and subdomains on which you are using checkouts.
Note: We handle registration for Checkout Page domains and custom domains. You only need to add websites to which you're adding checkouts.

Verify your domain with Apple Pay
If you use Apple Pay, follow this step to verify your domain with Apple Pay. You can verify your domain before or after registering it.
- Download the domain association file.
- Host it at
/.well-known/apple-developer-merchantid-domain-associationon your site. For example, if you registerhttps://example.com, make that file available athttps://example.com/.well-known/apple-developer-merchantid-domain-association. - Add your domain to Payment method domains. If you had already added the domain, click Verify to verify your domain with Apple Pay.
Enable Apple Pay and Google Pay in your checkout
Apple Pay and Google Pay are enabled on all new checkouts by default.
To enable or disable Apple Pay and Google Pay, see the steps below.
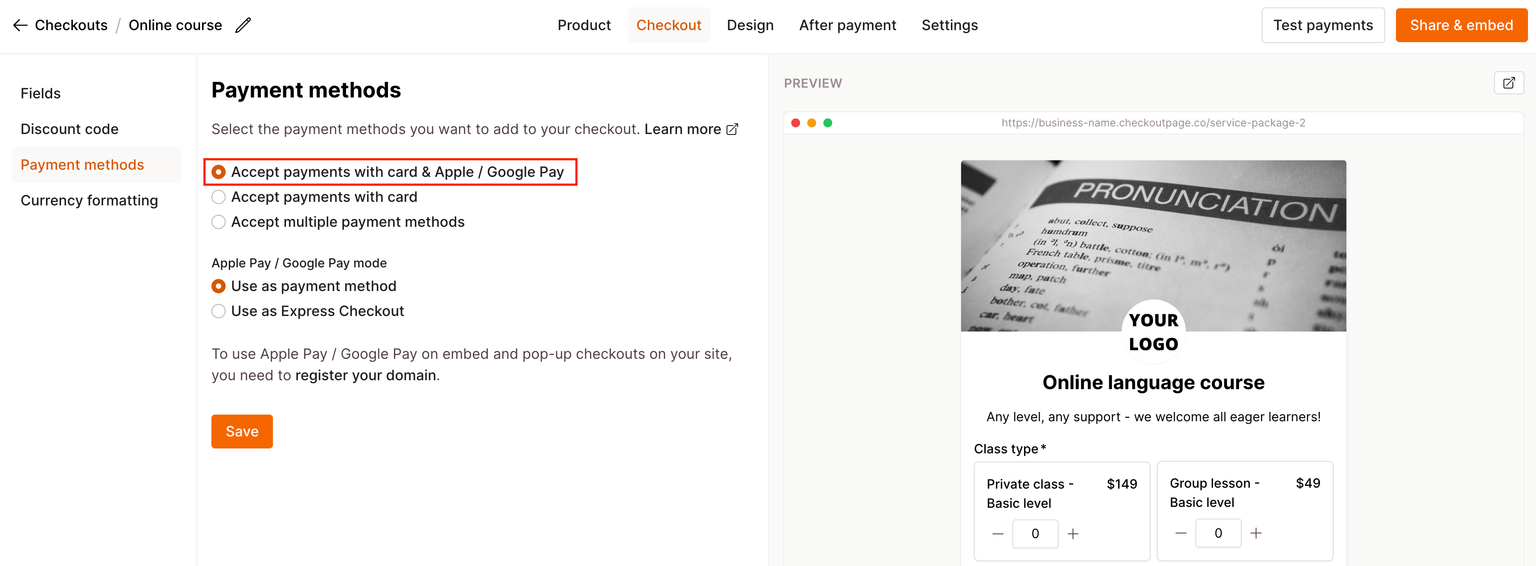
- Go to your Checkout Page dashboard and click on your checkout to edit it
- Navigate to Checkout and then go to Payment methods from the left-hand menu
- Select Accept payments with card & Apple / Google Pay

Accept payments with card & Apple / Google Pay is enabled by default for all new checkouts with Checkout Page.
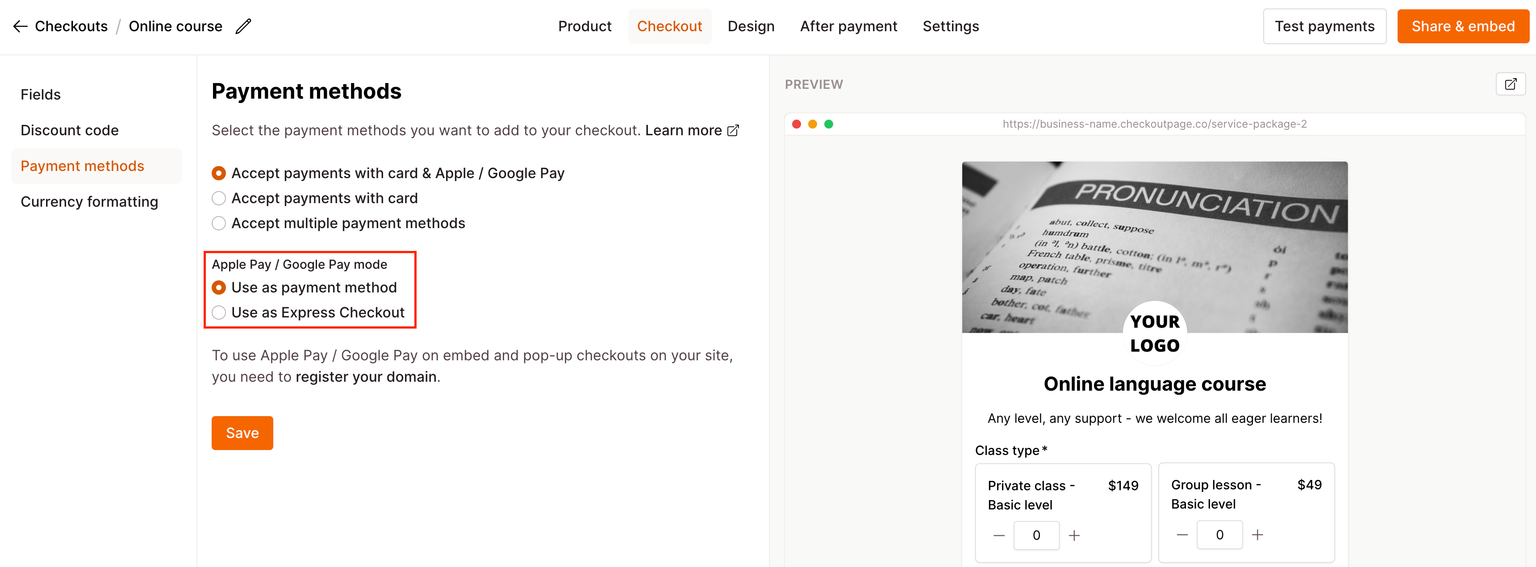
For Apple Pay and Google Pay, you can also select from the following options:
- Use as a payment method
- Use as express checkout
Apple Pay and Google Pay work with all pricing options (one-time, subscription, payment plan, pay what you want, free trial and setup fee).
The global enable/disable option for both Apple and Google Pay can be found on your dashboard under Settings, then Payments. Untick to switch it off.

Enabling/disabling Apple and Google Pay individually is not possible.
It is not possible to only accept Apple and Google Pay without accepting card payments.
Comparing additional payment method vs Express Checkout
When considering accepting payments with Apple and Google Pay, Checkout Page gives the option of using it as an additional payment method or as Express Checkout.

An additional payment method is displayed above the card field and captures completed checkout fields, while express checkout is displayed above checkout fields and automatically collects name and email, skipping incomplete fields.
Apple and Google Pay additional payment method
- Displayed above the card field
- Captures completed checkout fields
Apple and Google Pay Express Checkout
- Displayed above checkout fields
- Automatically collects name and email, whilst skipping over incomplete checkout fields
Accepting both Apple Pay and Google Pay in addition to multiple payment methods
Apple Pay and Google Pay can be accepted alongside other payment methods, appearing as additional options for customers to choose from.