Zapier integration
Connect Checkout Page with Zapier to create sales funnels, marketing automations and tons of other workflows.
What can you do with Zapier?
Zapier lets you connect Checkout Page with thousands of apps. By doing so, you can send data collected on Checkout Page to other apps you use or trigger actions in other apps, like sending an email or adding a customer to a spreadsheet. Once you connect your Checkout Page account with Zapier, you can create Zapier actions using the following triggers:
- New charge (one-time payment)
- New subscription
Example integrations you could set up are:
- Add new payments to a Google Spreadsheet
- Add new subscribers to ConvertKit or Mailchimp
- Invite new customers to a Discord server
- Add new orders to a fulfilment service
- Add new customers to a Drip campaign
- Add new orders to your e-commerce store
- Add new payments to your bookkeeping software
Please note: To integrate with Zapier, your Checkout Page account needs to be on the Scale or Grow plan.
How to connect Checkout Page with Zapier?
Creating automation (Zaps) is pretty straightforward. Most people want to save some payment details (such as date), customer information (such as name & email) and data from custom fields.
Below we'll walk you through how you can add new subscriptions to a Google Sheet. Integrating Checkout Page with other apps will be similar, so this should give you an idea of how to set it up. If you need help, just send us a message.
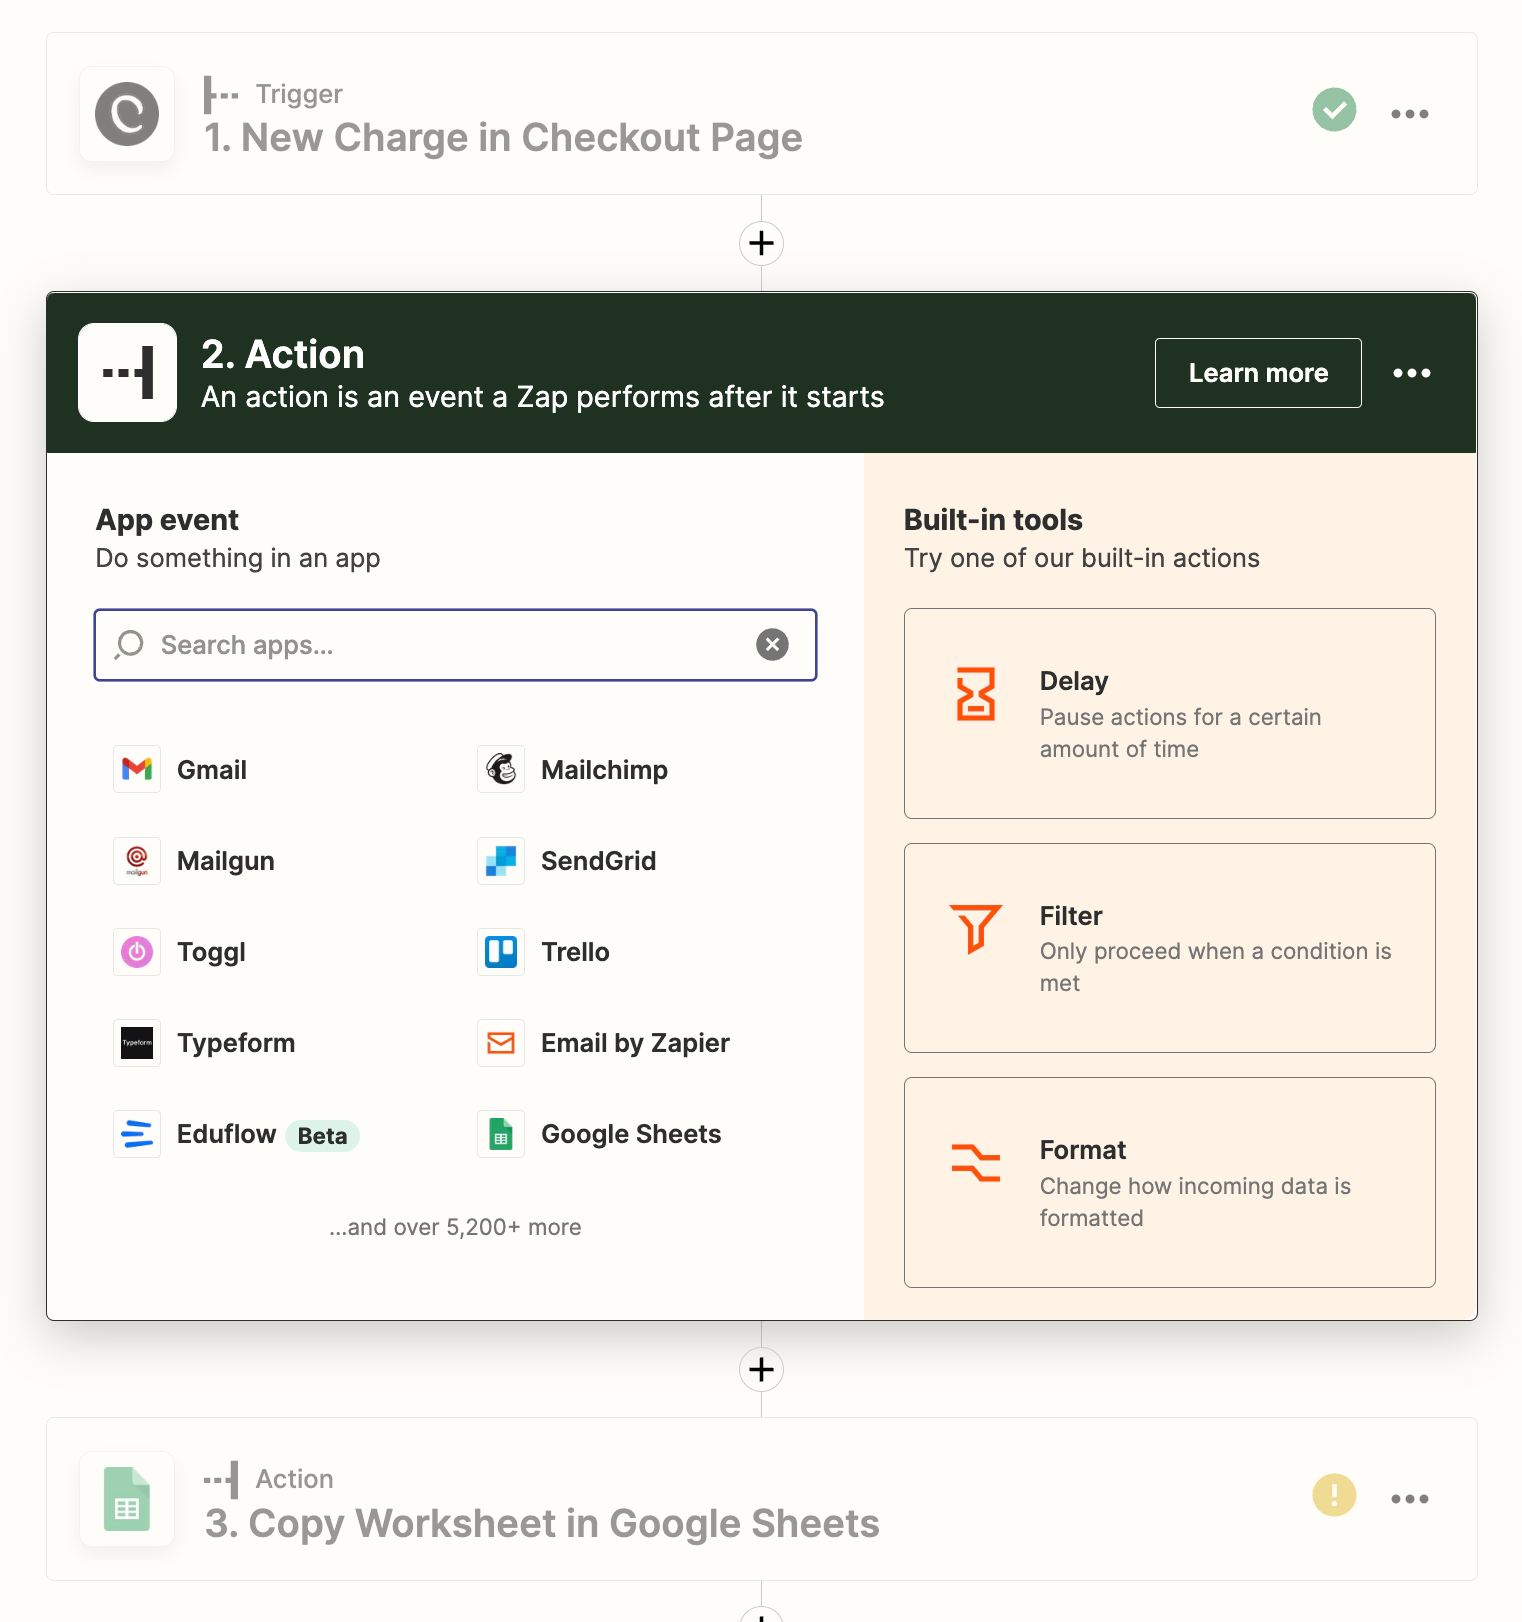
1. Create a Zap
We'll create a Zap that adds new subscriptions as a new row in a Google Sheet. We'll connect Checkout Page with Google Sheets:

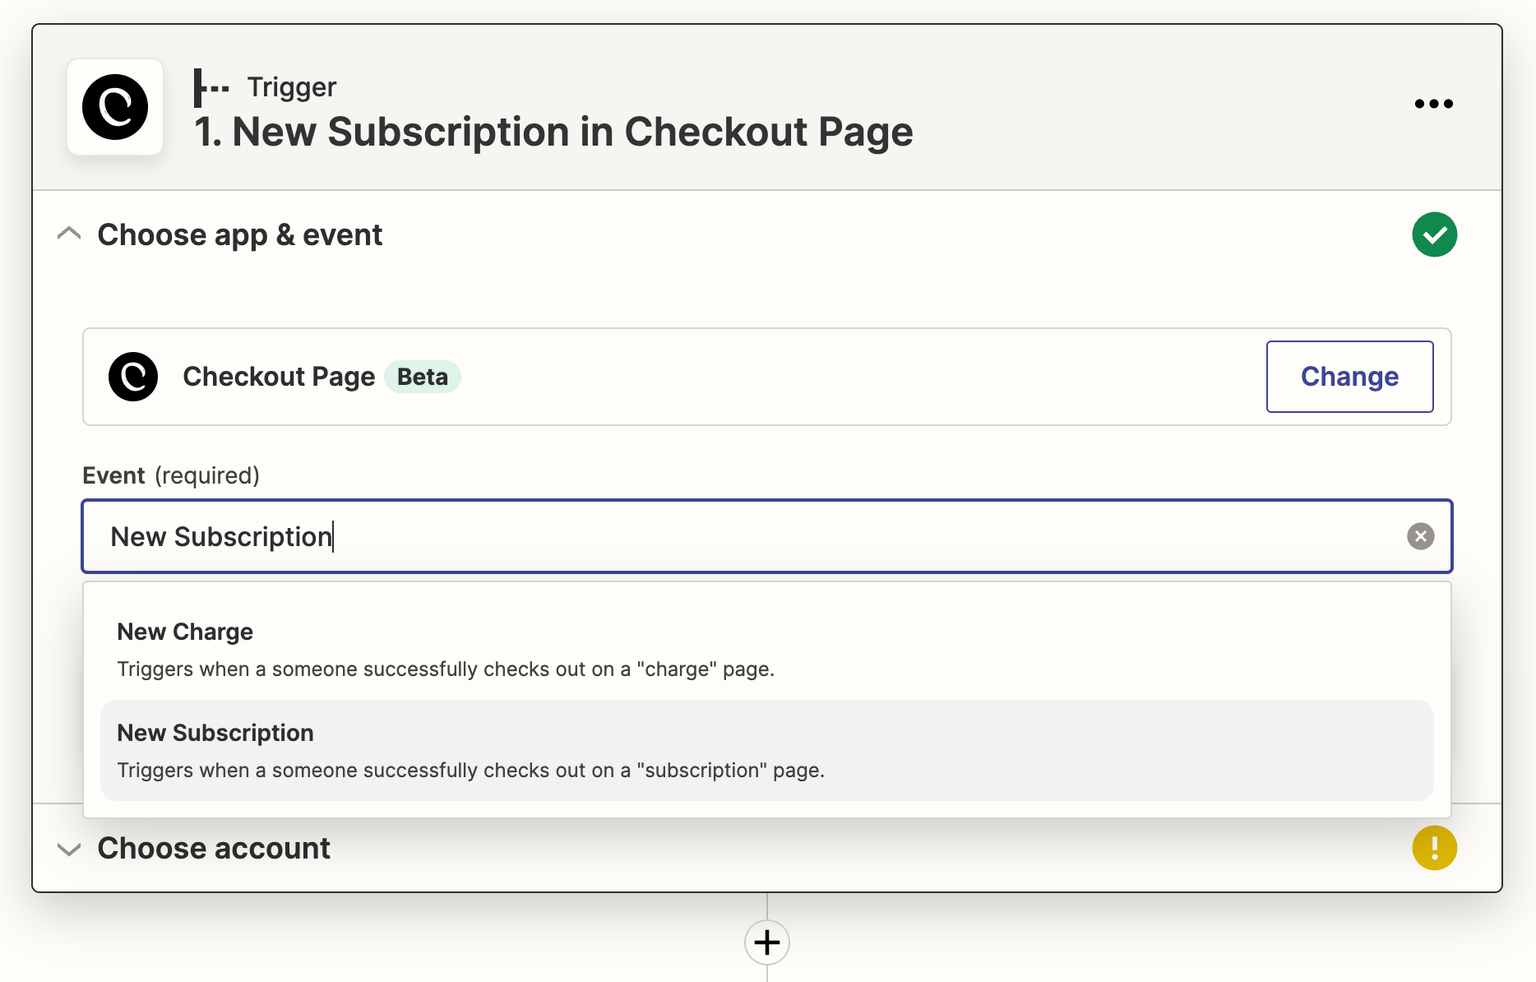
2. Select a Trigger event (new payment or new subscription)
Choose if you want this zap to run on new one-time payments (New Charge) or on new subscriptions (New Subscription)
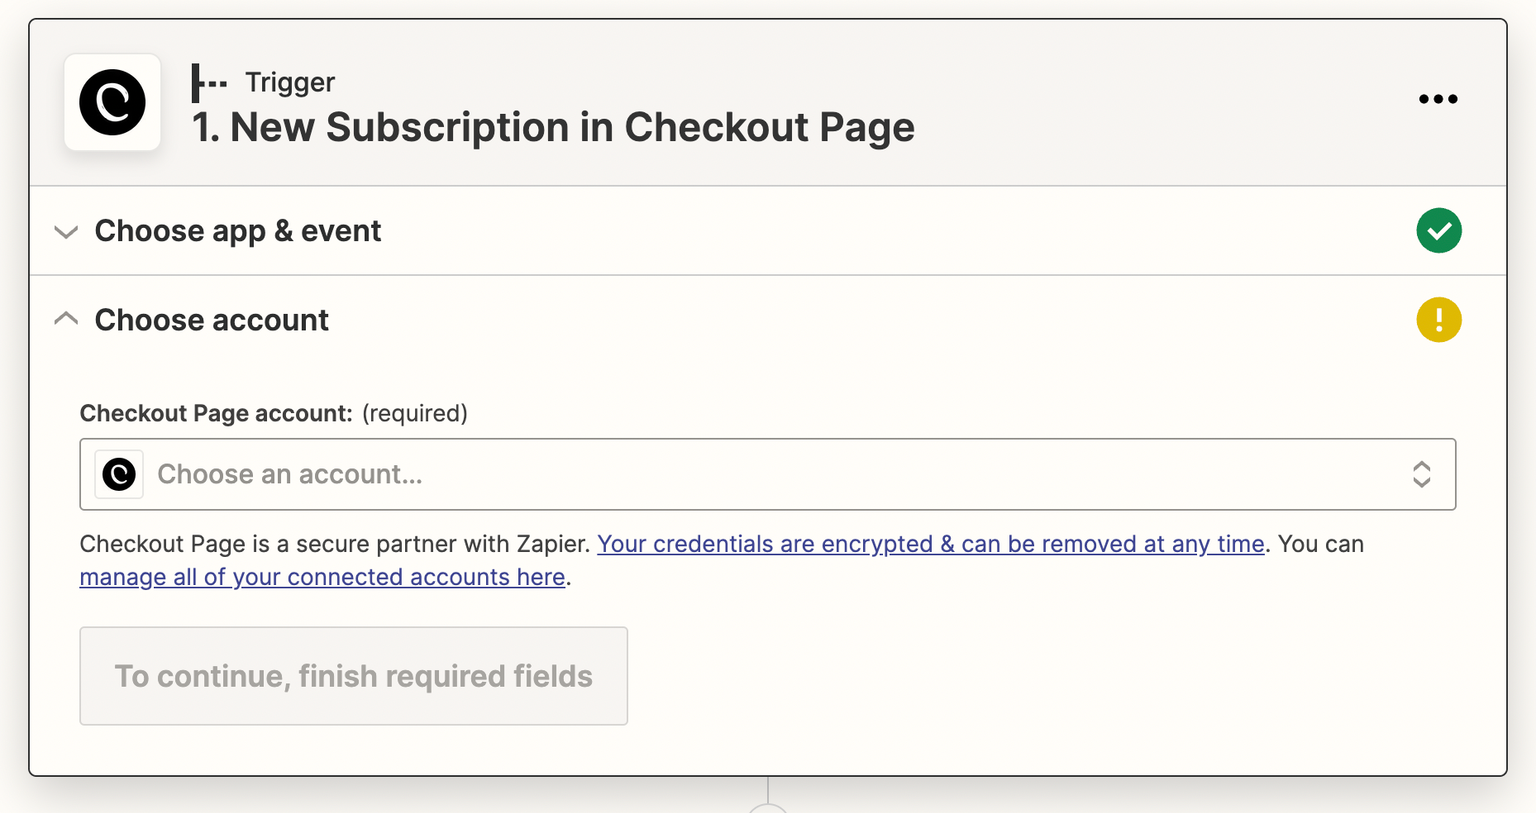
3. Connect your Checkout Page account
Click Choose an account and then + Connect a new account. You can log in with your Checkout Page account email & password.
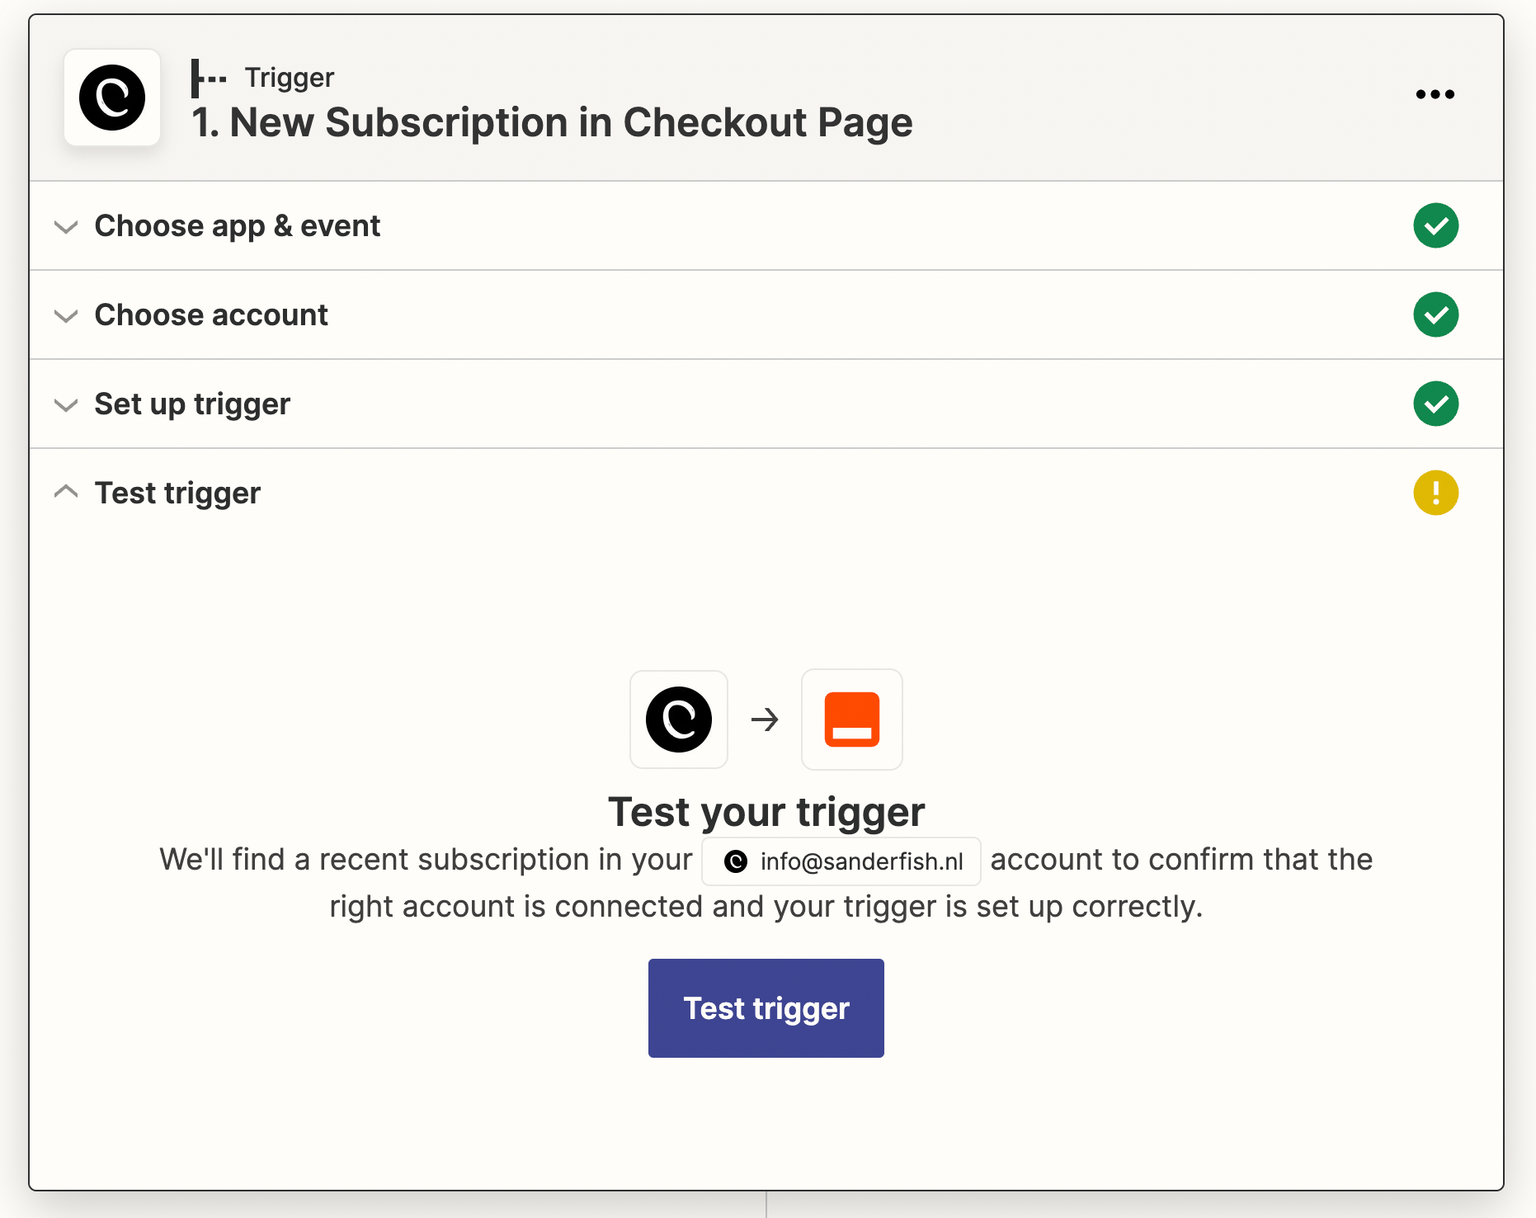
4. Test trigger
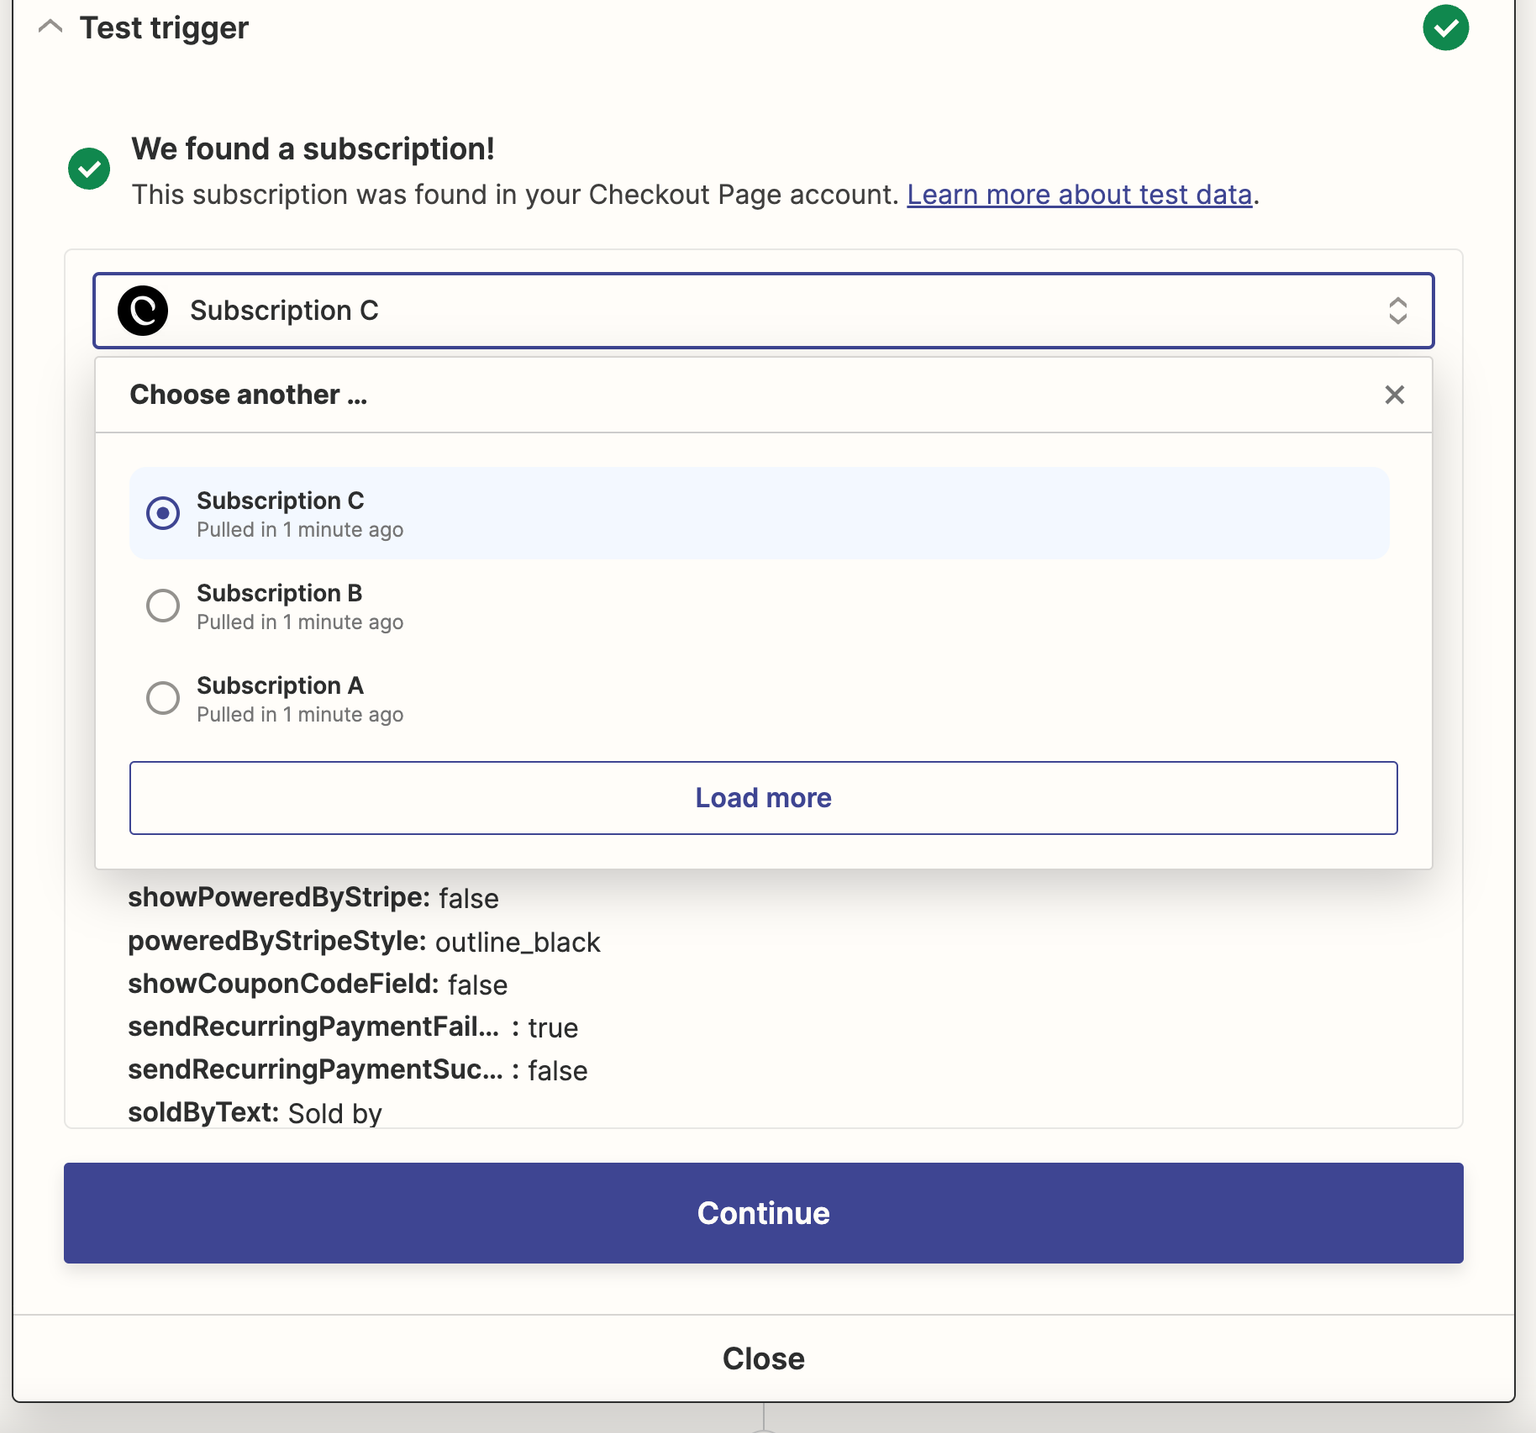
Select an existing subscription (or payment) to use as a template.
You'll need at least one live (not test) subscription (or payment) in your Checkout Page account.
We recommend temporarily changing the price of your checkout to $1, or using a discount code that lowers the price to $1, and then checking out at to your own checkout.
After you've done so, you'll be able to find the subscription (or payment) in Zapier by clicking Test trigger.
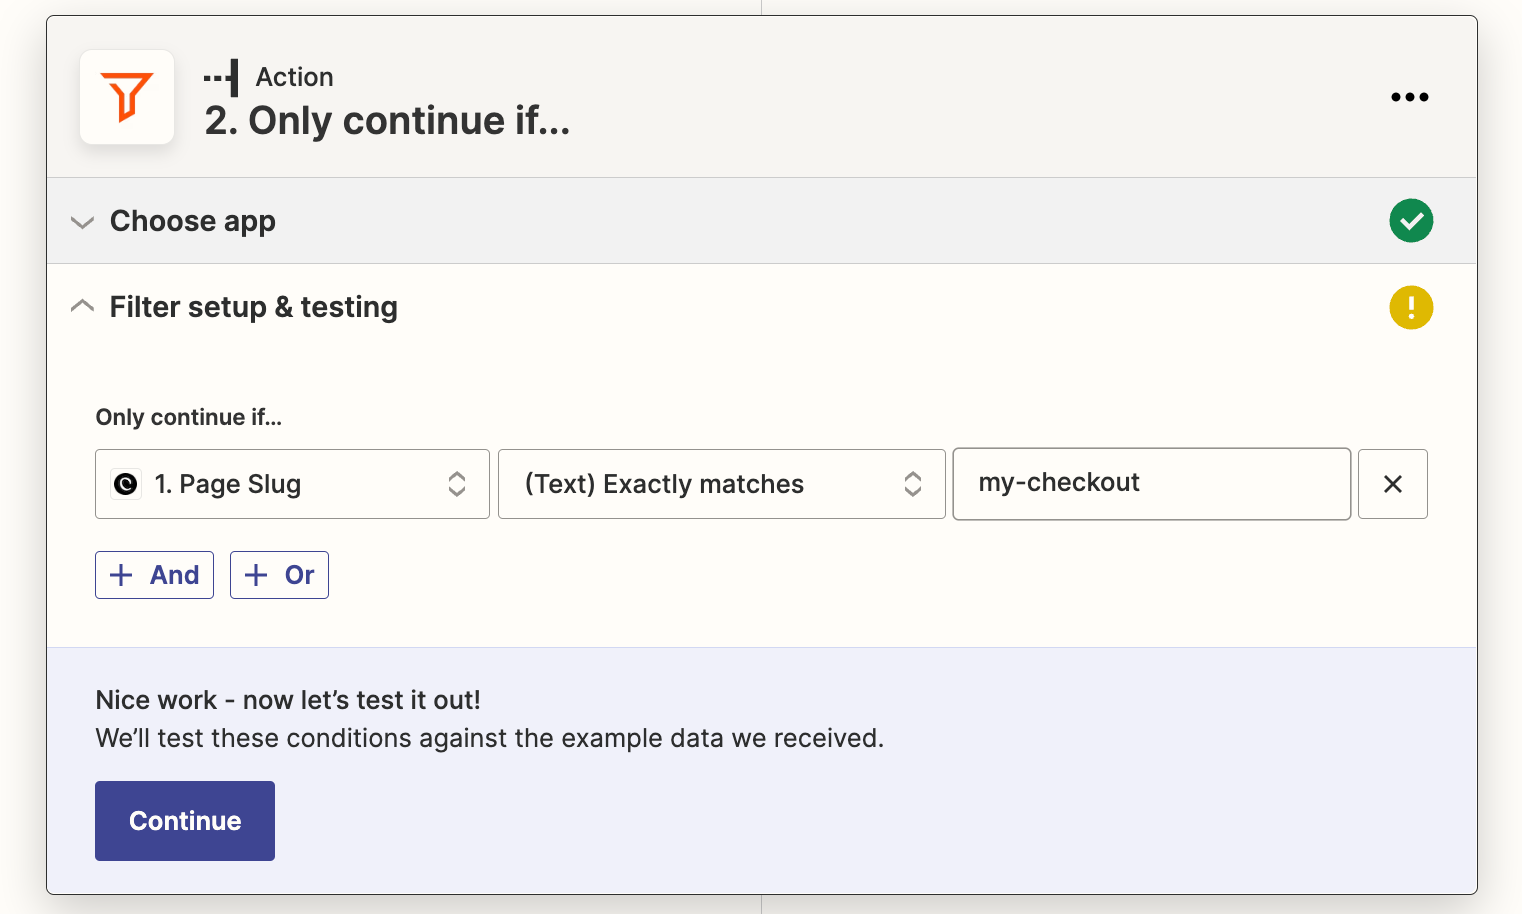
5. Add a filter step (optional)
Currently, this zap will trigger for every new subscription or payment.
You may want to add a Filter Step to limit when this zap will trigger.
For example, if you want the Zap to only trigger on certain checkouts, you can filter by Page Slug.
- Click the + button to add an additional step and select Filter.
- Set up the filter
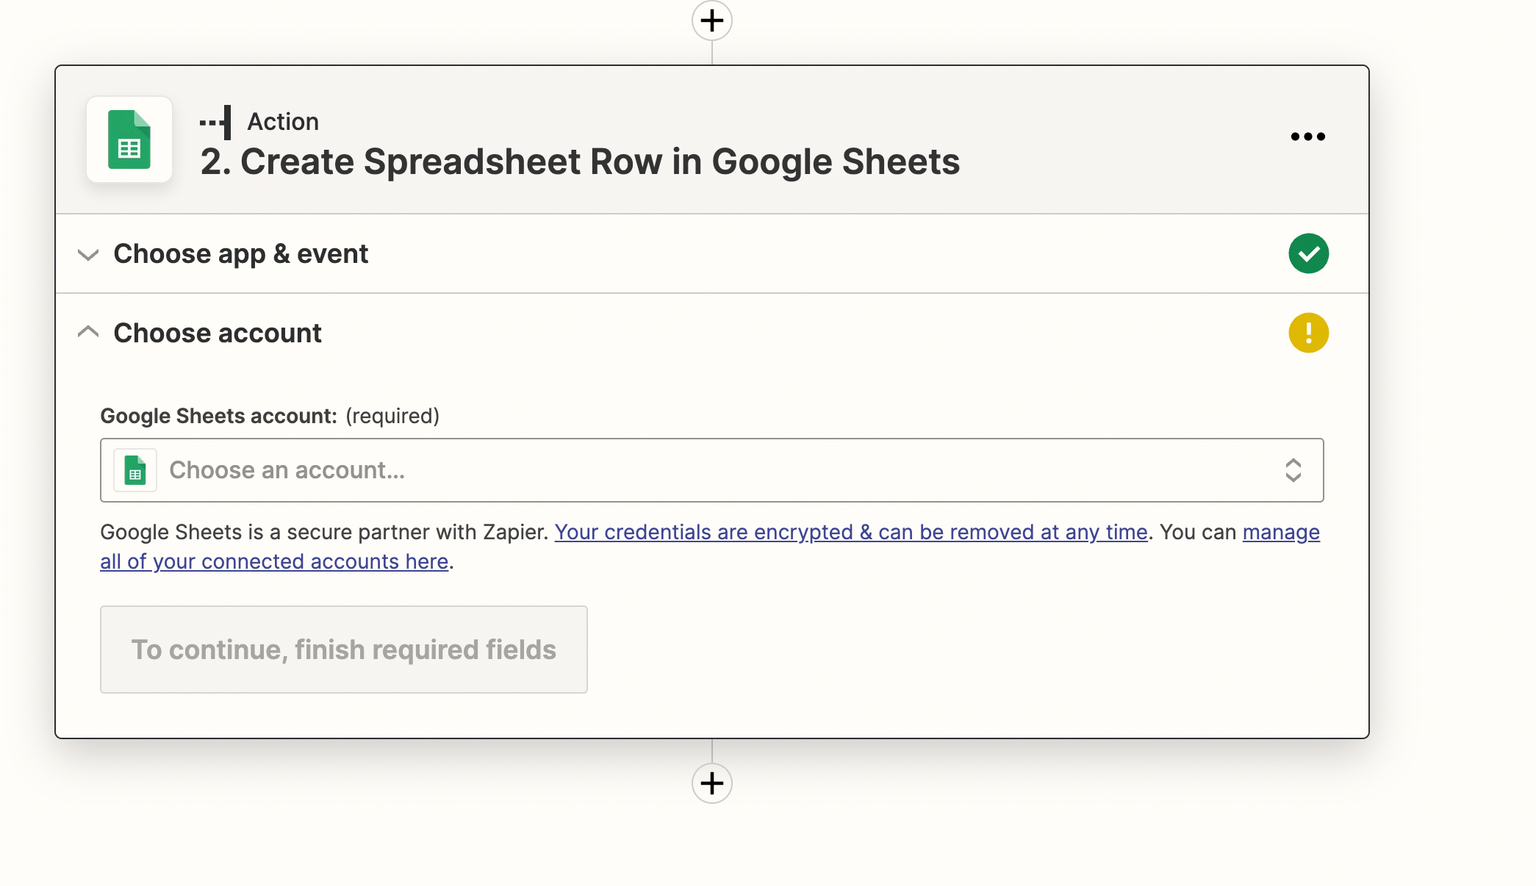
6. Select an action
Move on to the Action box, and select the event Create Spreadsheet Row (or choose any other action)

7. Select (or connect) your Google Sheets account
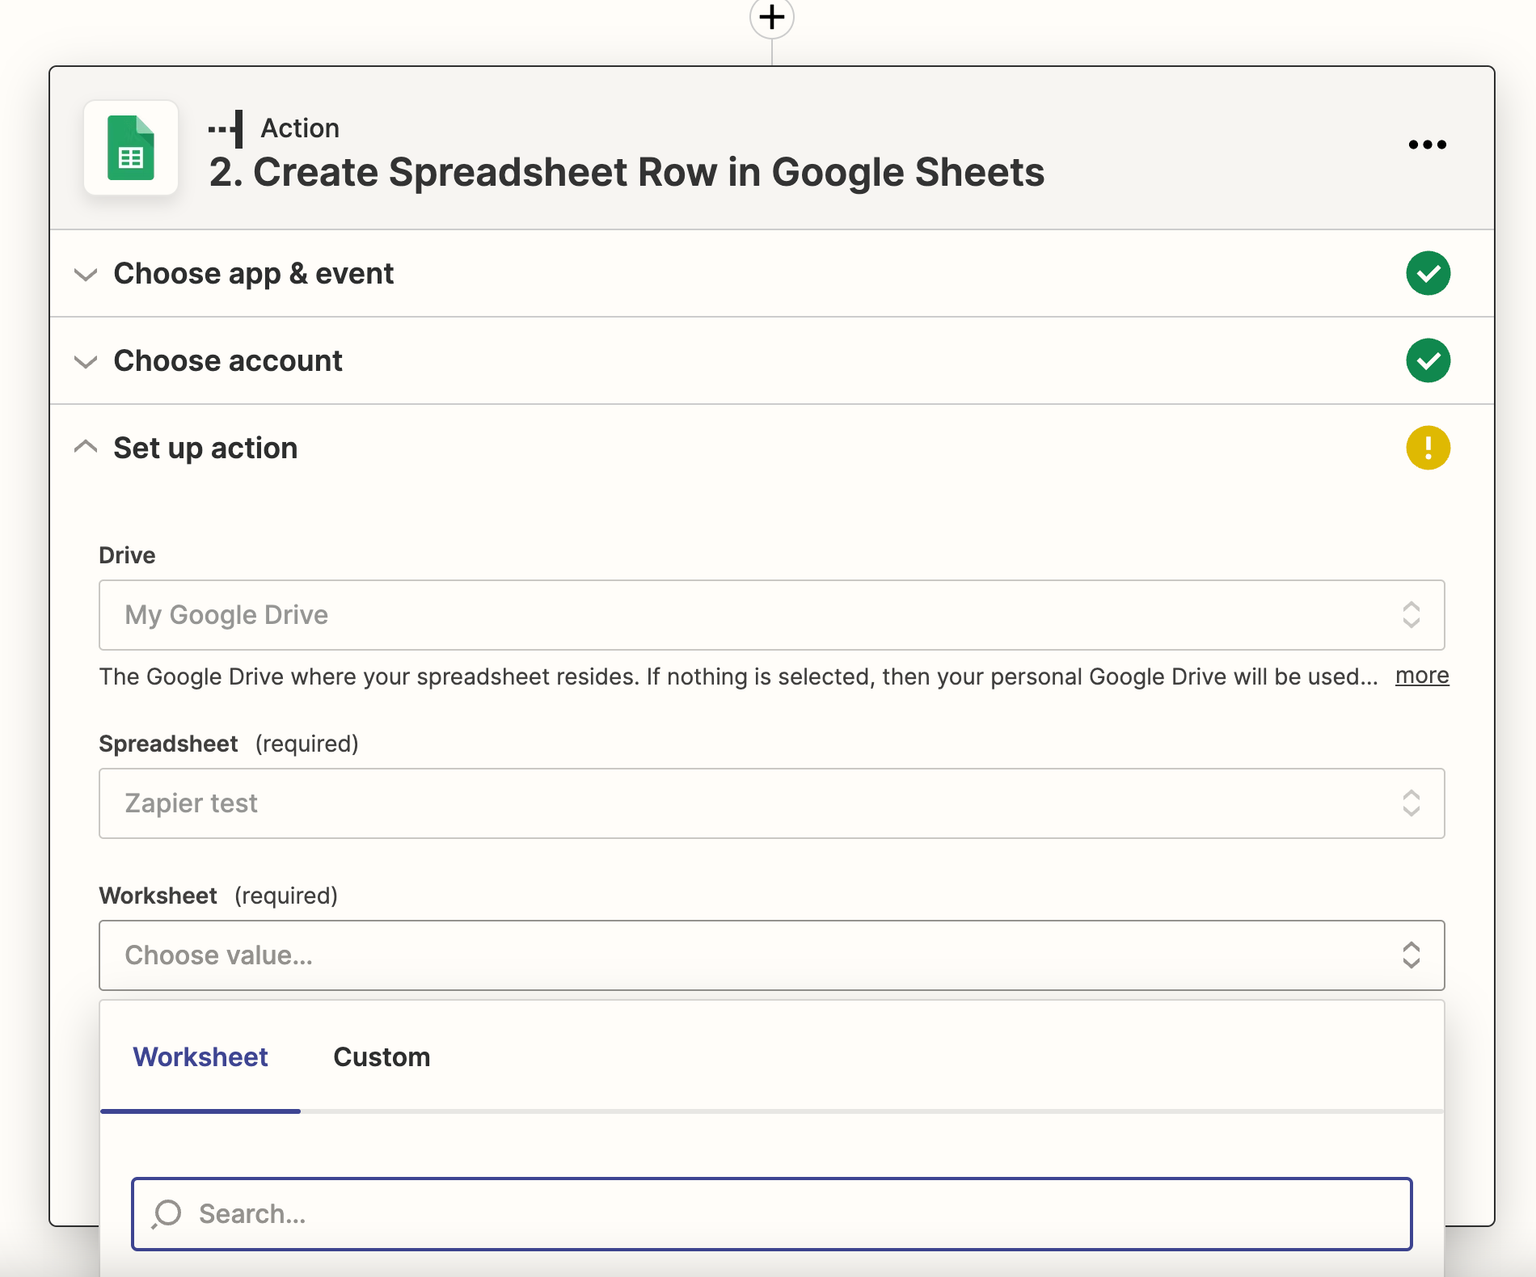
8. Select the drive, spreadsheet and worksheet you want to store your subscribers in
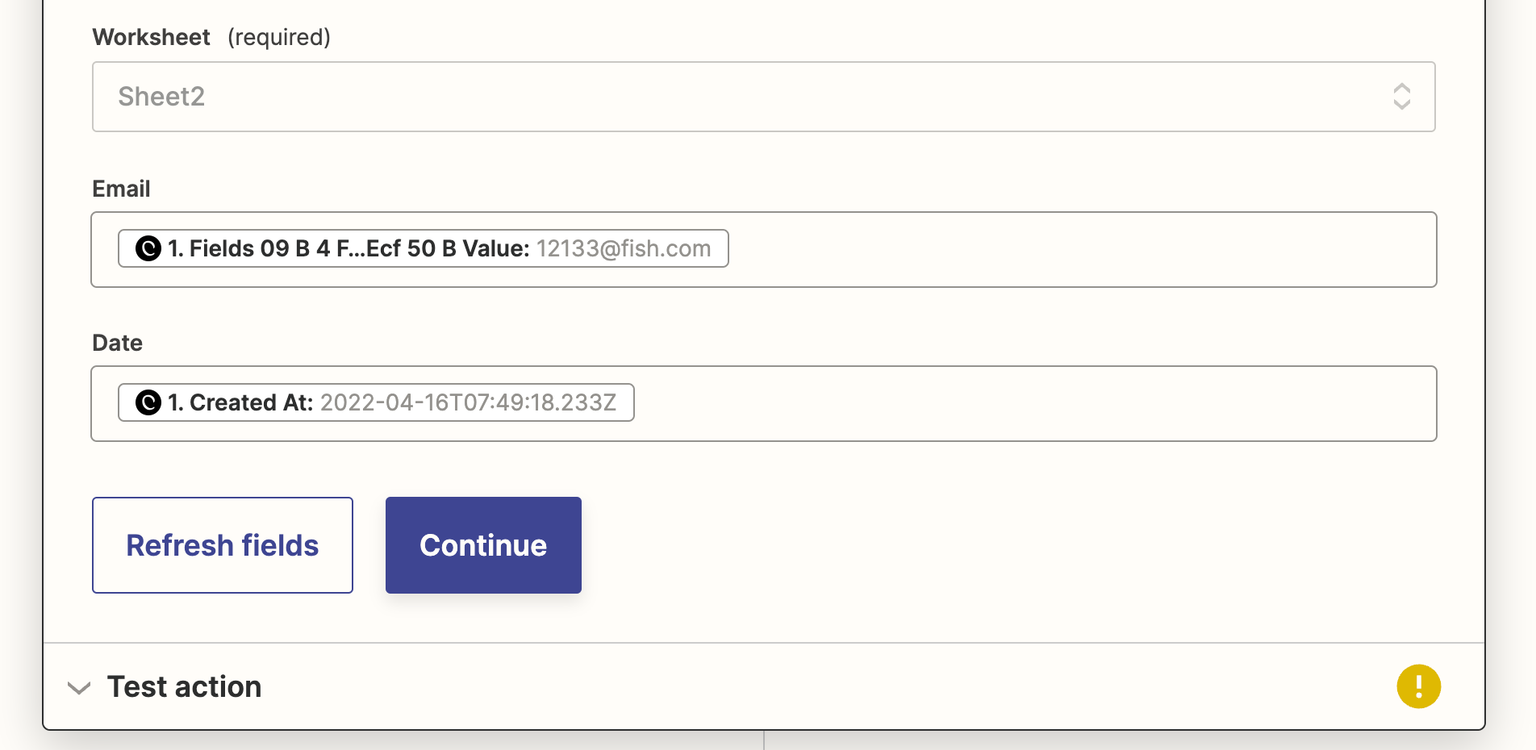
9. Select payment/customer details to add to the Spreadsheet
Based on the selected spreadsheet, Zapier will display the rows or columns you can populate with subscriber data. In our example spreadsheet, that's Email and Date.
By clicking on the field, you'll find all the information related to the subscription.
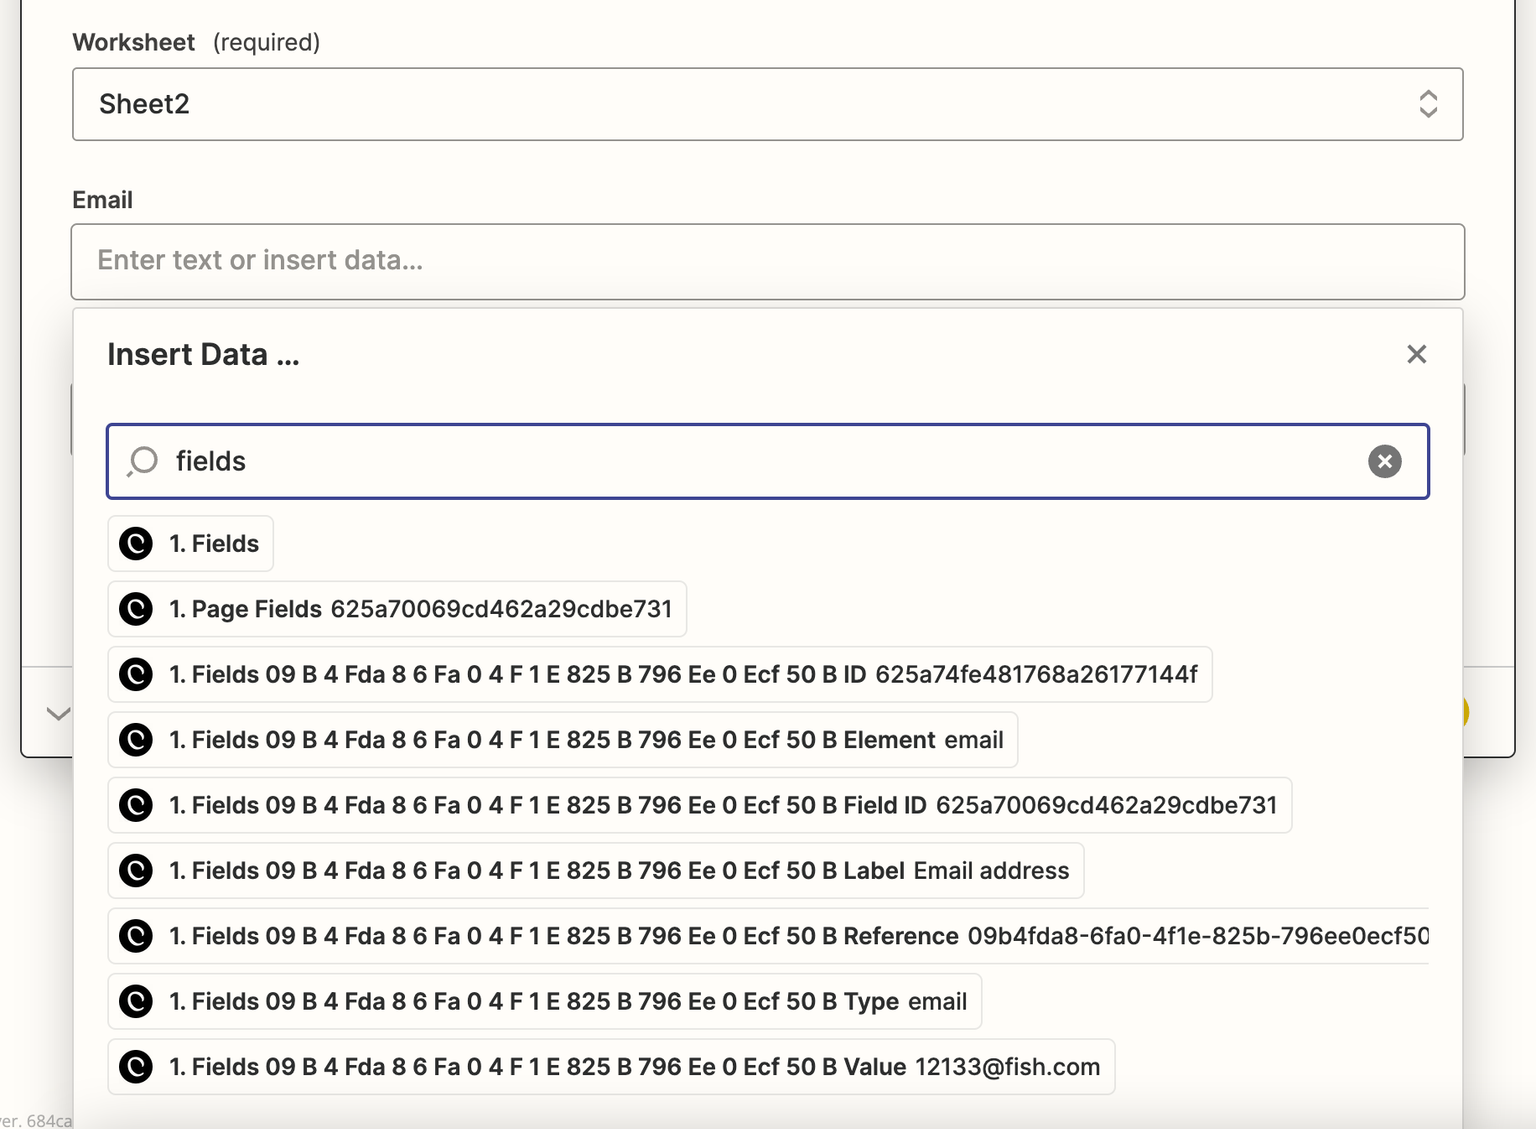
To access a custom field value, you can type in 'fields'.
In bold, you'll see Fields [reference] Value, and in regular text, you'll find the value of that field in your subscription.
In the example below, you would select the last item with the value "12133@fish.com"
Repeat those steps for all details you want to add to your spreadsheet.
Here we've selected the email field, and the Created At field to store the date the subscription was created.
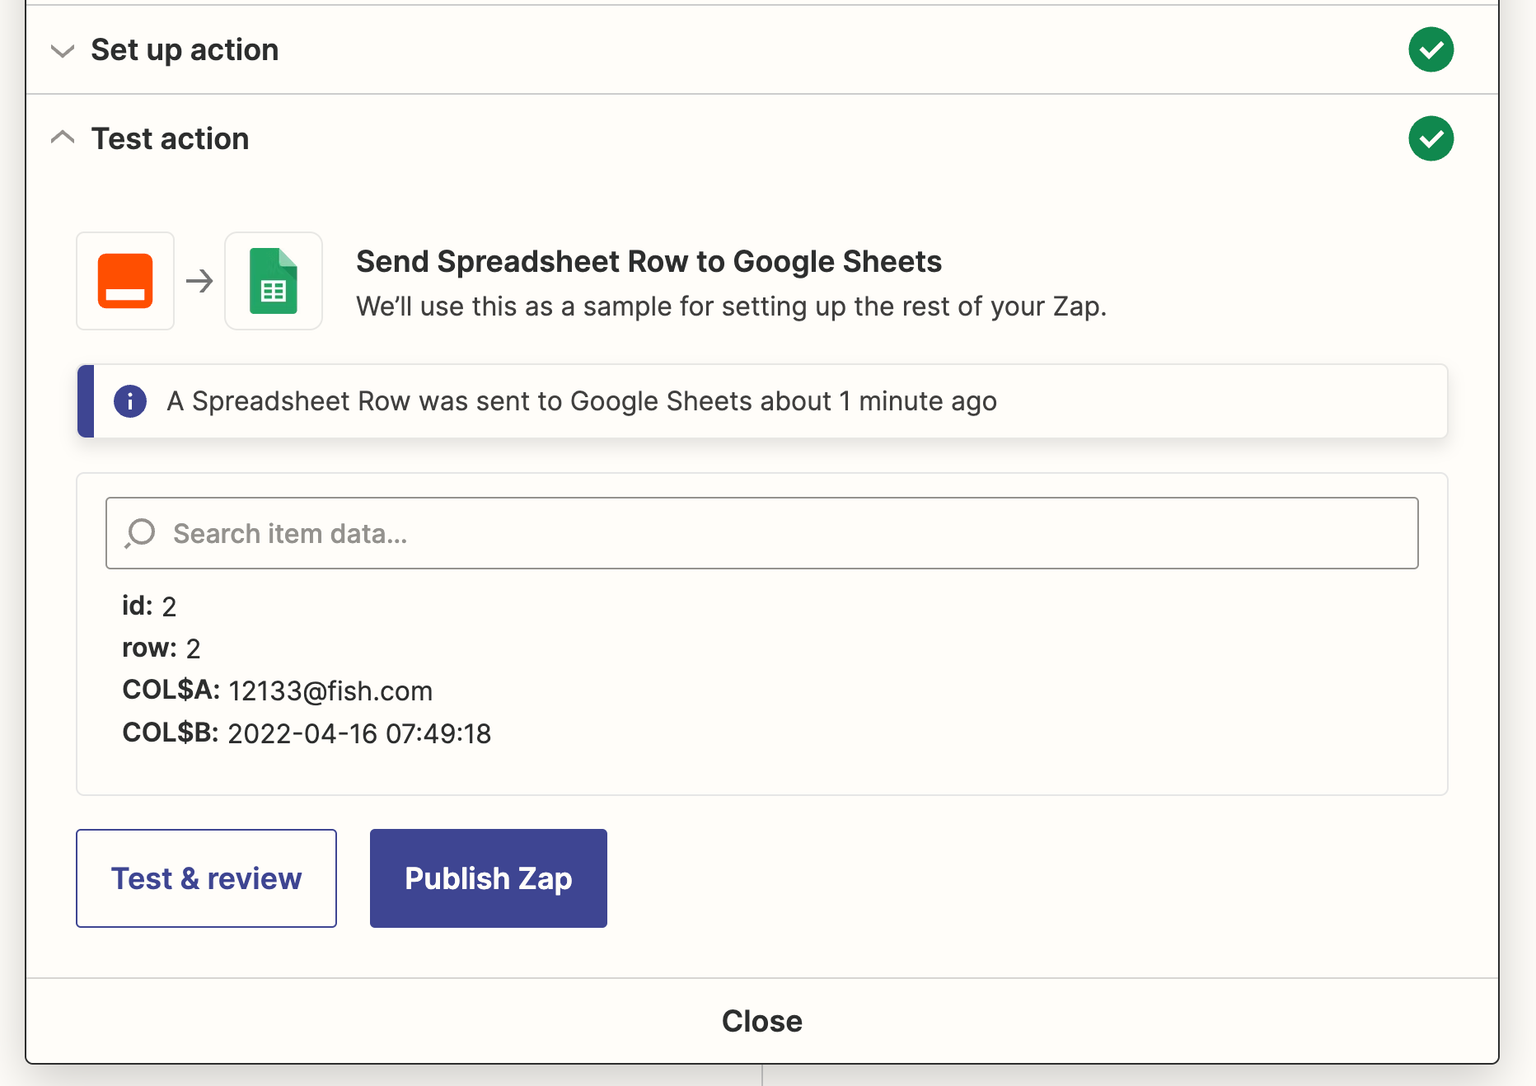
10. Test your Zap's action
Test the action to ensure your setup works.
When you click Test & Review, Zapier will trigger the event and send the data to your spreadsheet.
You'll be able to go back and make changes if needed.
11. Publish zap!
Once you're all set up, publish your zap!

That should be it! If you need any help creating your zaps, just send us a message!