Add Checkout Page to Webflow
In this help article, you will learn how to add your checkout to your Webflow landing page.
With Checkout Page, you can easily create a one-page checkout and add it to your site in different ways.
Here are the instructions for Webflow.
Add a Buy button
You can add a Buy button that links to your checkout to open it in the same or a new window.
Follow these steps to do it:
- Open the page builder on Webflow
- From the left-hand menu, select Add Elements
- Drag Button and drop it in the desired place on your page
- From your Checkout Page dashboard, click on the checkout you want to link to
- Then click on Share & embed in the top right corner and copy the payment link
- Delete # from the URL field in the Link Settings pop-up on Webflow and paste the new link from Checkout Page instead
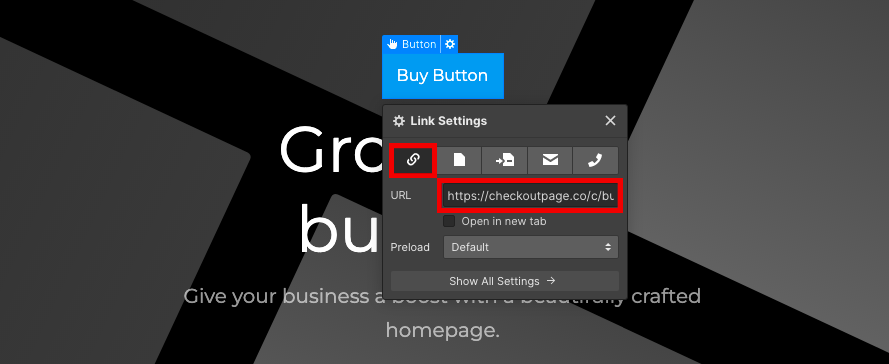
- Tick Open in new tab if you’d like your checkout to open in a new tab
- Double-click on the button text to change it as you wish
- Preview your page through the little eye on the top left and publish when you’re ready
Add a pop-up checkout
Adding a pop-up checkout is a great way to let your customers check out on your site while hiding the checkout from those just browsing.
Note: this option requires a paid Webflow account or an active site plan on your Webflow project.
Here’s how to add it:
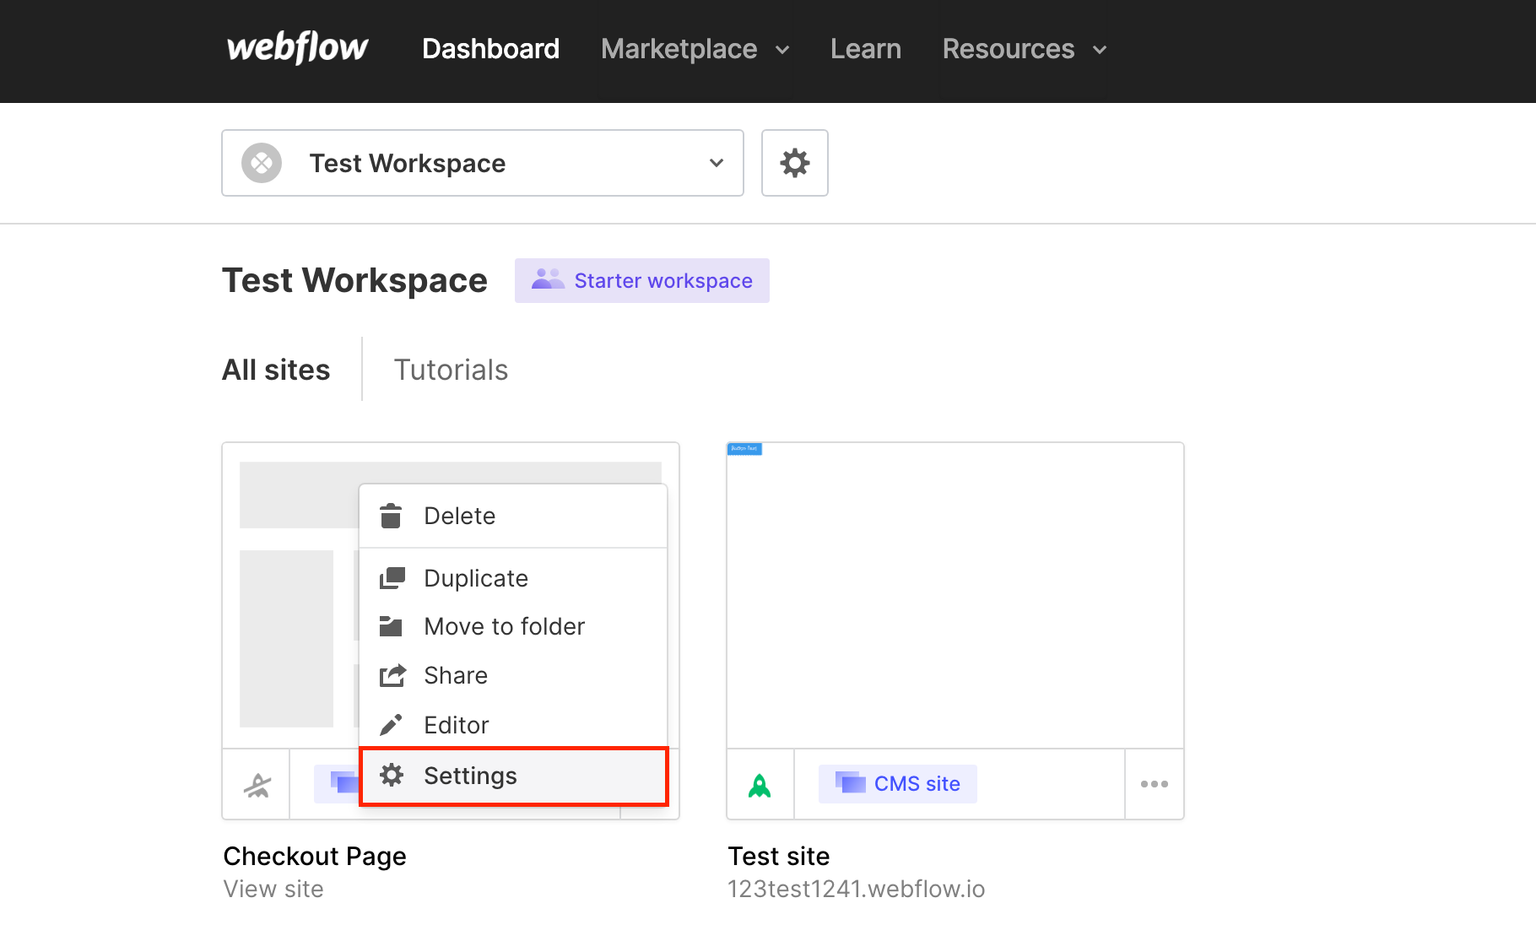
- Open your Webflow dashboard
- Click on the three dots next to the site you’d like to edit and go to Settings
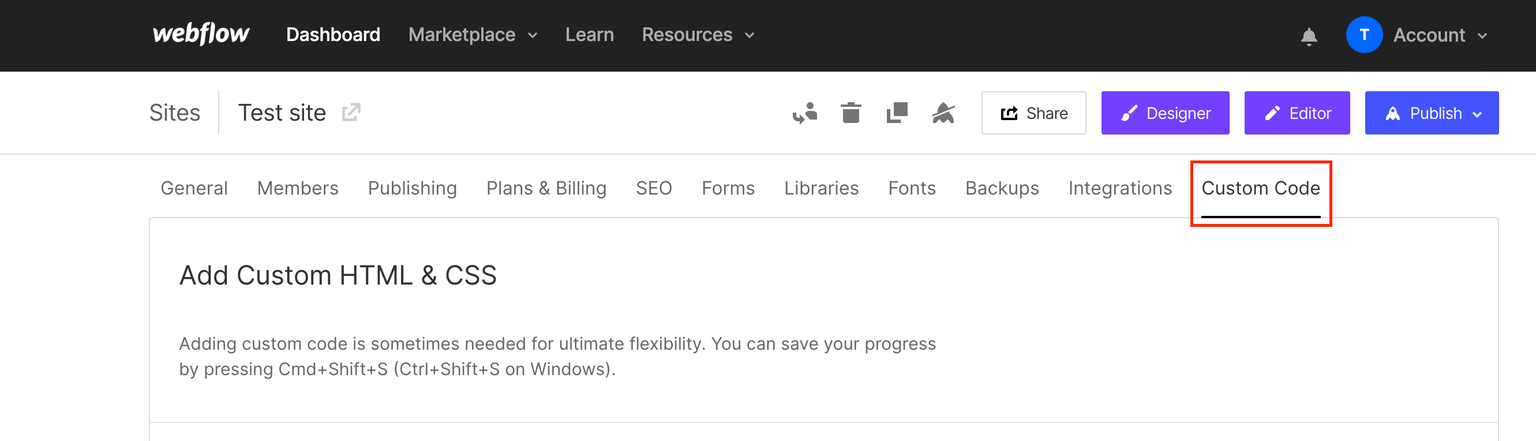
- Go to the Custom Code tab
- From your Checkout Page dashboard, click on the checkout you want to add and then Share & embed
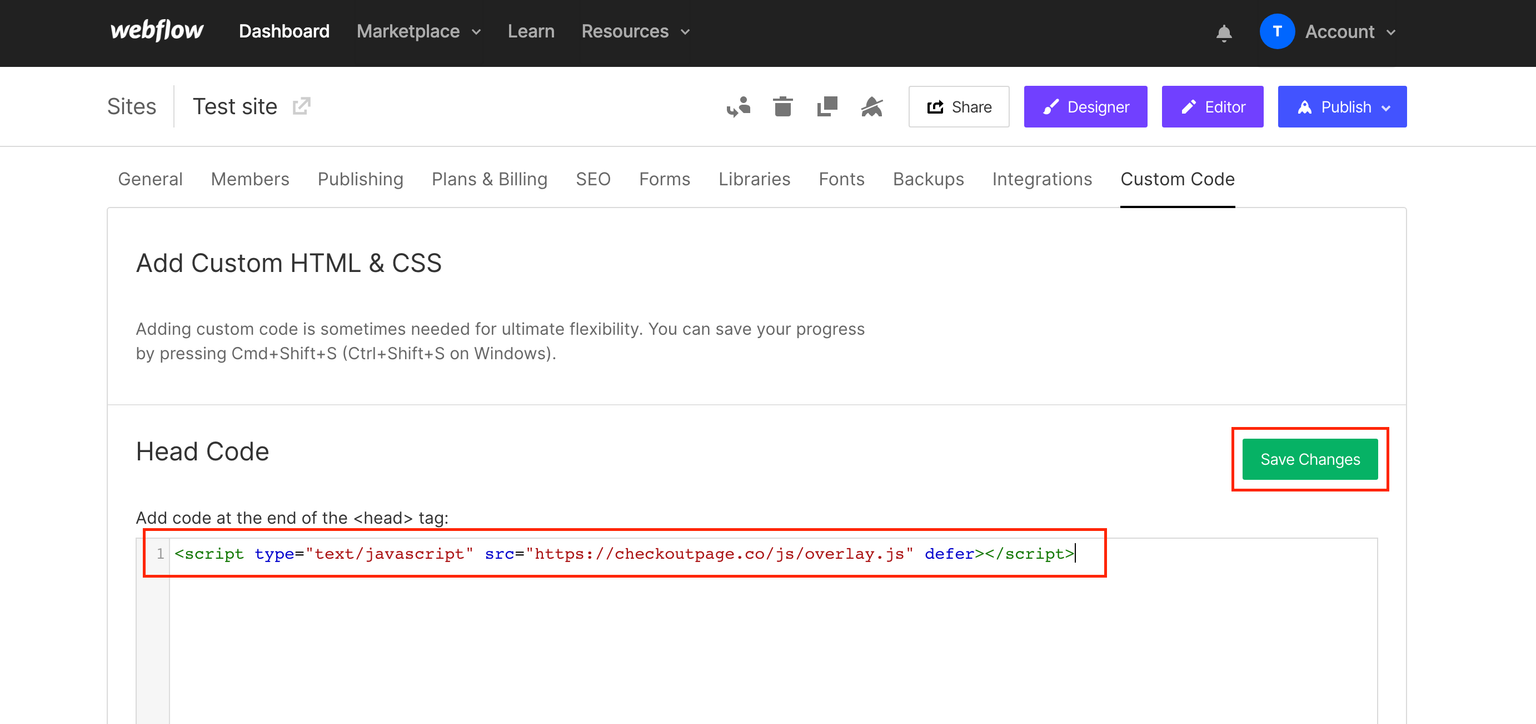
- Go to the Pop up section and copy the Script code under Webflow
- Paste this script code into the Head Code box on Webflow and Save changes
- Open your page Designer and from the left-hand menu, click on Add Elements
- Click on Button to add it to your page
- Back on Checkout Page, copy the payment link below the Script code
- Delete # from the URL field in the Link Settings pop-up on Webflow and paste the new link from Checkout Page instead
- From the button settings on the right side of the page, click the paintbrush to open the Style tab
- Click on the + under Selector and type in
cp-buttonand enter
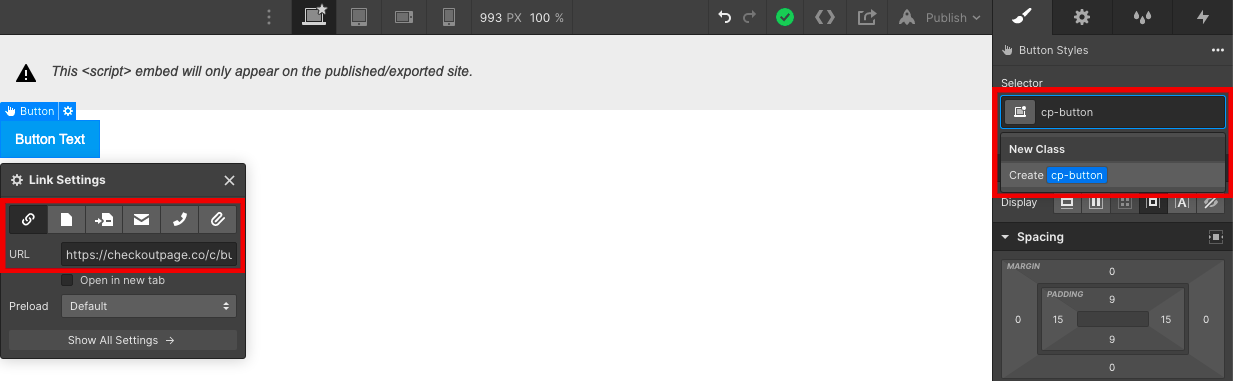
- Publish your page to preview
Embed your checkout
Embed your checkout on your landing page for your customers to finish their purchases on your site.
Note: this option requires a paid Webflow account or an active site plan on your Webflow project.
Let us guide you through it:
- Open the page builder on Webflow
- From the left-hand menu, select Add Elements
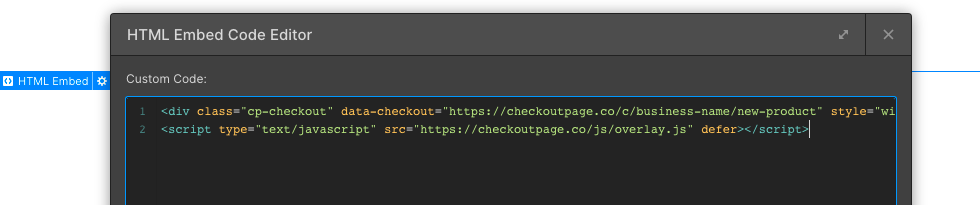
- Drag Embed from the Components section and drop it on your page
- From your Checkout Page dashboard, click on the checkout you want to add and then Share & embed
- Go to the Embed section and copy the Embed code under Webflow
- Paste this embed code into the box on Webflow and click Save & Close
- Publish your page to preview
Great, now your checkout has been added to your landing page!